Keeping your air fryer clean is essential for its performance and longevity. Luckily, cleaning your air fryer doesn’t have to be a daunting task. With these simple steps and tips, you’ll have a spotless air fryer in no time!
Jump to:
Why Cleaning Your Air Fryer is Important
Regular cleaning helps maintain your air fryer’s efficiency and ensures your food tastes its best. Grease, food residues, and odors can impact the flavor and quality of your meals. Plus, a clean air fryer is more hygienic and reduces the risk of cross-contamination. Make cleaning your air fryer a habit, and you’ll enjoy healthier, tastier meals every time.
Parts of an Air Fryer
Understanding the parts of your air fryer is crucial for effective cleaning. Here’s a quick rundown:
- Main Unit: The core of the air fryer, housing the heating element and controls.
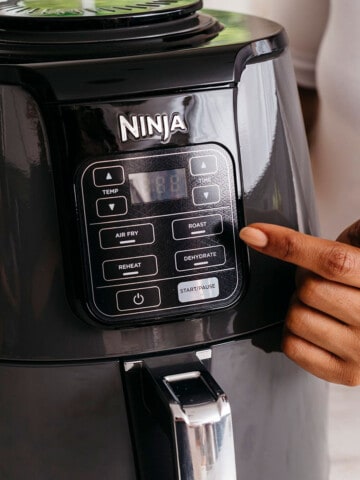
- Control Panel: Where you set time, temperature, and other settings.
- Cooking Chamber: The space where the food cooks, including the heating element and fan.
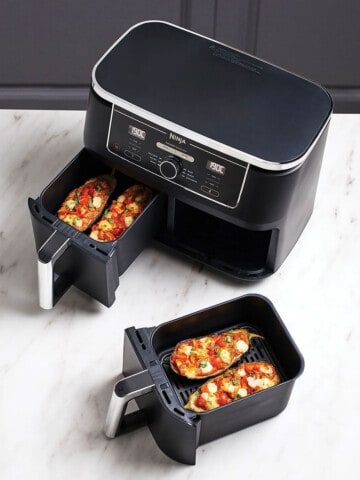
- Removable Basket or Tray: Holds your food and is often made of non-stick material. Many air fryers have 2 trays - one for your feed and one to be used as a drip tray.
- Heating Element: Generates heat for cooking.
- Fan: Circulates hot air for even cooking.
- Ventilation System: Allows excess heat to escape and prevents overheating.
Most removable parts, like the basket or tray, are often dishwasher-safe. However, the main unit should never be submerged in water.
🧽 Everyday Air Fryer Cleaning
Preparing Your Air Fryer for Cleaning
- Unplug and Cool Down: Always unplug your air fryer oven and let it cool down completely before starting the cleaning process.
- Remove Components: Take out the air fryer basket and any other removable parts. If your model has a bottom drawer, pull it out as well.
Cleaning the Exterior
Use a damp microfiber cloth with warm water to wipe down both the outside and the interior of the air fryer. If there are greasy spots, add a tiny bit of dish soap to the cloth. Allow the exterior to air dry completely before reassembling.
Cleaning the Air Fryer Basket
- Routine Cleaning: For regular cleaning, rinse the basket with warm, soapy hot water. If it’s dishwasher-safe, you can use that too. Rinse thoroughly and dry with a clean towel.
- For Tough Stains: Soak the basket in hot, soapy water for 30 minutes. Use a soft-bristled brush or sponge to scrub away stubborn stains. For extra cleaning power, sprinkle some baking soda on the sponge.
Cleaning the Bottom Drawer
Wash the bottom drawer with warm, soapy water after each use. For tougher stains, let it soak in hot, soapy water, then scrub gently with a kitchen sponge.
Removing Tough Stains
- Soak: Submerge the basket and bottom drawer in hot, soapy water with a few drops of dish soap for about 30 minutes.
- Scrub: Use a sponge or soft brush to scrub away tough stains. For persistent grease, add baking soda to the sponge.
- Rinse and Dry: Rinse thoroughly with clean water and dry completely before reassembling.
✨ Deep Cleaning Your Air Fryer
Every now and then you might want to give your air fryer some extra TLC to extend its lifespan and give it a much needed refresh. Deep cleaning your air fryer is an essential step to maintain your air fryer and ensure your food is cooked in a clean environment.
Here's a step-by-step guide on how to deep clean an air fryer, along with some extra tips.
Air Fryer Basket
- Prepare: Unplug the air fryer. The best way to remove fresh grease stains is right after cooking, so in that case carefully remove the air fryer basket while it’s still hot. For your safety, wear gloves! For any older, baked on grease, let the air fryer cool down completely before removing and cleaning the basket.
- Apply Paste: Drizzle dish soap on stains and sprinkle with baking soda. Use a soft, non-abrasive brush to scrub - I like to keep an old toothbrush for cleaning purposes like this!
- Soak: Submerge the basket in hot, soapy water for 30 minutes. This will help to loosen any stuck-on residue or food particles. Don’t let it soak for too long - if the water cools completely it can be harder to remove leftover stains!
- Scrub: Gently scrub with a non-abrasive sponge or brush, paying extra attention to the areas with tough stains. If needed, sprinkle some extra baking soda on the sponge or brush for extra cleaning power.
- Rinse and Dry: Rinse thoroughly with clean water and dry thoroughly before use.
Extra Deep Cleaning Tips:
- For even deeper cleaning, you can create a paste using baking soda and water. Apply the paste to the stubborn stains on the basket, let it sit for a few minutes, and then scrub it off.
- To remove any lingering odors from your air fryer basket, place a small bowl of white vinegar in the bottom of the air fryer basket and run a short cooking cycle without any food. Make sure the bowl you use is heat-proof! I like to use a small ramekin.
- Regularly inspect the air fryer basket for any signs of wear or damage. If you notice any peeling or scratches on the non-stick coating, it's best to replace the basket to avoid potential health risks.
🛠️ If you struggle to get your basket cleaned with these gentle steps, it might be time for a new air fryer basket.
You can purchase replacement baskets for most air fryer models, so just have a look online to find the right replacement for your device.
Vent
Over time, sticky grease and dust can accumulate in the vent, affecting its performance and even causing unpleasant odors.
But don't worry, deep cleaning the vent is easier than you might think. Follow these simple steps to get your air fryer vent sparkling clean:
- Gather Your Cleaning Supplies: To clean the air fryer vent, you'll need a soft-bristle brush or toothbrush, warm water and mild dish soap.
- Remove Cover: Most air fryers have a removable vent cover that allows you to access the vent for cleaning. Locate the vent cover on your air fryer and carefully remove it. I like to slip a small clean knife under the edge of the vent to gently lift it up. Take your time to avoid any damage to the cover or the air fryer itself.
- Soak: Fill a medium bowl with warm water and add a small amount of mild dish soap. Place the vent cover in the soapy water and let it soak for a few minutes. This will help to loosen any sticky grease or dust that has accumulated on the cover.
- Scrub: Use a soft-bristle brush or toothbrush and gently scrub the cover. Be sure to pay attention to all the nooks and crannies where grease and dust tend to build up. Use gentle circular motions to remove any stubborn residue.
- Rinse and Dry: Once you're satisfied with the cleanliness of the vent cover, rinse it thoroughly with clean water. Shake off any excess water and pat the cover dry with a clean towel. Ensure that the vent cover is completely dry before reattaching it to the air fryer.
- Clean Opening: Use a dry brush to remove dust and debris from the vent opening. Be careful not to apply too much pressure or damage the delicate parts and keep water away from the electric parts at all time.
- Reattach: Ensure everything is dry before reattaching the cover. Ensure that it is securely in place and properly aligned.
Heating Element Cover
As with any air fryer cleaning, make sure the air fryer is unplugged and completely cooled down before starting.
- Locate and Remove: Check if your model allows you to remove the heating element cover. Refer to the manufacturer’s instructions to carefully remove the cover.
- Soak: Prepare a sink or basin with hot soapy water and place the cover inside to soak for 30 minutes.
- Scrub: Use a soft-bristle brush or a toothbrush to scrub away any visible dirt or stains dust or debris from the cover. Be gentle and don’t apply too much pressure. For tougher grease stains, add dish soap and baking soda (bicarbonate of soda) to the brush for an extra effective scrub.
- Rinse and Dry: Rinse thoroughly and dry completely before reattaching.
⚠️ Air Fryer Parts You Shouldn’t Clean
Avoid submerging or cleaning the heating element and fan directly. Use a dry or slightly damp cloth to wipe them down gently, following your manufacturer’s instructions.
🧴 Cleaning Equipment & Products
Keeping your air fryer spick and span is crucial for maintaining its performance and ensuring your food always comes out delicious.
But before you dive in with your cleaning supplies, let’s break down the do’s and don’ts of air fryer cleaning equipment and products.
Do’s: What to Use ✅
- Soft Cloth or Sponge
For a gentle touch, a soft cloth or a soft sponge is your best friend. Dampen it with warm water—just make sure it's not dripping. This is perfect for wiping down both the inside and outside of your air fryer without risking any damage. - Non-Abrasive Brush
Got some stubborn stains or baked-on grease? A non-abrasive brush, like a kitchen brush or a toothbrush with soft bristles, can do wonders. It helps scrub away grime without scratching up the surface. - Scrub Daddy
Say hello to the Scrub Daddy! This non-abrasive sponge is ideal for your air fryer basket. It’s tough on stains but gentle on non-stick surfaces, so it won’t scratch your precious appliance. - Mild Dish Soap
Mix mild dish soap with warm water, and you’ve got yourself a great solution for general cleaning. It cuts through grease and food residues like a charm, keeping things fresh and clean. - Baking Soda
For those really tough stains, baking soda is your natural cleaning hero. It tackles baked-on grease and grime with ease. Just make a paste and apply it to the trouble spots.
Don’ts: What to Avoid 🚫
- Harsh Chemicals
Stay away from harsh chemicals like bleach or ammonia-based cleaners. They can damage your air fryer’s surface and leave behind nasty residues. Stick to milder options for a safe clean. - Abrasive Materials
This is a big no-no! Avoid metal sponges, steel wool, scouring pads, or any other abrasive materials, as well as any metal utensils. They can scratch and damage the non-stick coating, which might lead to food sticking or even harmful particles mixing with your meals. - Pink Paste and Abrasive Cleaners
While they might sound effective, they’re usually too rough for your air fryer. These can scratch and degrade the non-stick surface, so keep them in the cupboard.
Before you start cleaning, always check the manufacturer’s instructions for your specific model. And if you're lucky enough to have dishwasher-safe parts, that’s a major bonus!
Happy cleaning, and may your air fryer continue to churn out perfect meals!
💡 How To Keep Your Air Fryer Clean
- Use Air Fryer Liners: Prevent residue from sticking by using disposable parchment liners or reusable silicone liners that make cleaning up a breeze.
- Line the Bottom Drawer: Use aluminum foil to catch any greasy drippings, but don’t let it touch the food.
- Add Water: For greasy foods, a small amount of water can help catch drippings. Check my post on adding water to an air fryer for more info.
- Clean After Every Use: Clean the bottom drawer and air fryer basket after each use to prevent any unpleasant odors and food contamination.
With these easy cleaning tips, you’ll keep your air fryer in top shape and ready for every cooking adventure. Regular maintenance ensures your air fryer performs well and your meals taste great. Happy cooking!
More Air Fryer Guides
💭 Frequently Asked Questions
You should not put water in an air fryer and turn it on as this can damage the device and create a fire hazard.
However, the removable, non-electric parts of the air fryer, such as the air fryer basket, can be washed and submerged in water for cleaning.
To learn more about using water in your air fryer and how to clean it properly, you can refer to my blog post on adding water to an air fryer.
To get baked-on grease out of an air fryer, start by soaking the affected parts, like the basket, in hot, soapy water for about 30 minutes. For stubborn stains, sprinkle baking soda on a damp sponge or brush and gently scrub the area.
The baking soda acts as a natural abrasive, helping to lift the grease without damaging the non-stick coating. Rinse thoroughly with clean water and dry completely before reassembling your air fryer.
Yes, you can use washing up liquid to clean an air fryer, but it’s best used on removable parts like the basket or tray. Mix a small amount of mild dish soap with warm water to clean these components, and avoid soaking them for too long.
For the main unit and heating element, use a damp cloth and steer clear of harsh chemicals or excessive water to prevent damage.
You should never add washing up liquid to your air fryer and then turning it on. This could create toxic fumes and even create a fire risk.
To clean your air fryer, avoid spraying harsh chemicals or cleaning agents directly inside. Instead, use a mild solution of dish soap and water. Lightly spray or wipe the air fryer’s interior with this mixture, then scrub gently with a soft brush or sponge to tackle any stubborn residue. Make sure to thoroughly rinse and dry the interior before using the air fryer again.
Always check your manufacturer’s guidelines to ensure your cleaning method is safe for your specific model!
You should clean your air fryer after every use to keep it in top shape. This includes wiping down the exterior and cleaning the basket and bottom drawer to prevent residue buildup and unpleasant odors.
For a deeper clean, aim to do this once a month or as needed, especially if you notice stubborn stains or grease buildup.
Regular maintenance ensures your air fryer remains efficient and your meals taste fresh.
© 2025 Romy London / Romina Callwitz | All images, videos, wordings and content are copyright protected and belong to Romina Callwitz. Please do not use any of my content without prior permission. If you wish to re-publish any (part of my) content, please get in touch via email. Thanks for your support!
*Disclosure: This page may contain affiliate links and sponsored links that earn me a small commission, at no additional cost to you. You can find more information in my Privacy Policy.








💭 Leave a Comment