

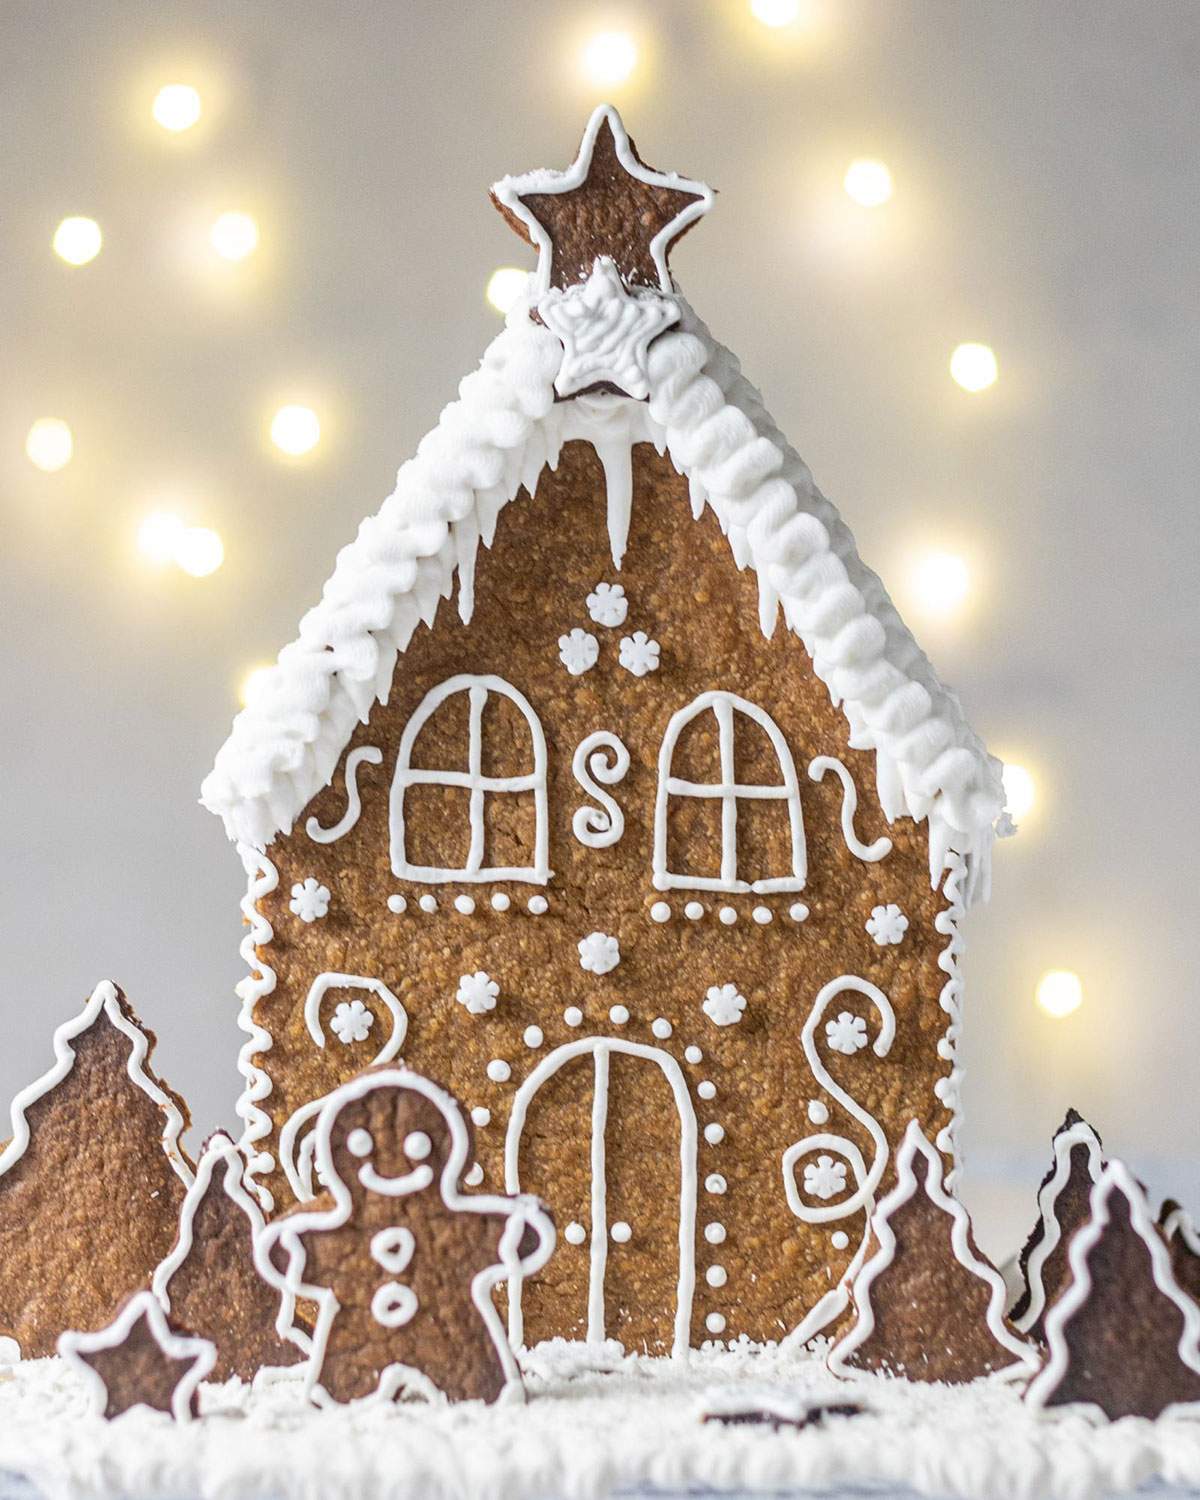
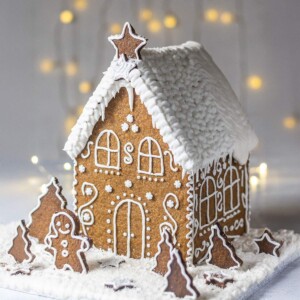
If you’ve always wanted to make your own Vegan Gingerbread House but weren’t sure where to start - this one’s for you!
With this easy recipe guide, you can make your own Vegan Gingerbread House from scratch for the holiday season. It includes a base recipe for vegan gingerbread without molasses and an easy-to-use vegan aquafaba icing that will hold your gingerbread house together just perfectly!
❤️ What Great About This Recipe
- 🌱 This recipe is 100% vegan!
- 📝 It’s straightforward and easy to follow, so even if it’s your first time making a gingerbread house, you’ll feel confident every step of the way.
- 🥖🚫 If you need a gluten-free option, this recipe adapts easily with a simple swap, so no one has to miss out on the fun.
- 🥛 It’s completely free from eggs, dairy and nuts.
- 🍪 The gingerbread comes out beautifully crispy and crunchy, which is exactly what you want for building a sturdy, long-lasting house.
- ✨ Beyond baking, it’s a genuinely fun and satisfying project - perfect for getting into the festive spirit with friends or family.
- 💪 Finally, this recipe is tailor-made to hold up well as a gingerbread house, so your creation will stay standing strong throughout the season.
Jump to:
Vegan Gingerbread House Recipe
I spent years admiring these festive showstoppers from afar, baking gingerbread cookies every Christmas but never actually building a house.
Honestly, I thought it would be too fiddly or that the biscuit might snap mid-assembly. But when I finally gave it a go, it turned out way easier than expected - and way more fun than I imagined.
This recipe uses a simple, sturdy vegan gingerbread dough that doesn’t require molasses (because let’s face it, who always has that on hand?). Instead, I’ve swapped in brown sugar to keep things easy, accessible and just as delicious.
Fun fact: brown sugar is actually made from a combination of plain sugar and molasses - making it so moist, soft, and sticky!
In this recipe, we're using brown sugar to sweeten the gingerbread, which also brings the perfect sticky-ness to hold our gingerbread house together, hooray!

Ingredients & Notes
For the Gingerbread Base:
- all-purpose flour - plain flour if you're in the UK
- ground ginger
- ground cinnamon
- light brown sugar - I prefer light brown for its perfect sweetness and moisture.
- vegan butter - melted, not just softened. I've used unsalted Flora Plant Butter.
For the Vegan Aquafaba Icing:
- aquafaba - The liquid from a can of unsalted chickpeas. When whipped, it creates stiff peaks and is an excellent egg white substitute for vegan baking.
- powdered sugar - confectioner's sugar or often also called icing sugar
- vanilla extract
- (optional) food colouring - see my notes below
For Decorating Your Gingerbread House
These can be totally to your personal preference! You can stick with just white icing to decorate your vegan gingerbread house or go all out with vegan smarties, chocolate buttons, marshmallows, etc.
Equipment
- electric hand mixer or stand mixer
- mixing bowls
- a baking sheet and non-stick baking parchment paper
- rolling pin
- sharp knives
- a cake board - a sturdy, food-safe flat surface to build your gingerbread house on, like a cutting board or sturdy cardboard covered in foil
- piping bag (pastry bag) & a thin round nozzle, plus extra nozzles for other decorations (optional)
- cookie cutters to create vegan gingerbread cookies for decoration, e.g. gingerbread trees etc.
- a few tins or tall glasses to have to hand to help keep the gingerbread walls in place whilst they're drying
Instructions (Step-by-Step)
How to Make Vegan Gingerbread for a Gingerbread House
Let’s kick things off by baking the gingerbread pieces that will form the walls and roof of your house.
Step 1 - Preheat your oven to 360°F (180°C) and line a couple of baking sheets with parchment paper.
Step 2 - Sift together the flour, cinnamon, and ginger into a large mixing bowl. This helps avoid lumps and gives you a smoother dough - worth the extra step!
Step 3 - Add the brown sugar and give everything a quick stir to combine.
Step 4 - Pour in the melted vegan butter and mix with a spatula or wooden spoon until a thick dough forms. It might feel a bit crumbly at first but will come together as you mix.
Step 5 - Knead the dough briefly until smooth, then divide it into 4 smaller portions. This makes it much easier to roll out - unless you’re feeling brave and want to go all in with one big piece.
Step 6 - Roll out the first portion on a sheet of non-stick baking paper or a silicone baking mat. Aim for about ¼ inch thickness (roughly 5 mm). For smoother rolling and less sticking, place another sheet of baking paper on top of the dough before using your rolling pin.
Mixing the Gingerbread Dough in a Stand Mixer
Alternatively, you can bring your vegan gingerbread dough together using a stand mixer. Use a low speed to medium speed to combine the flour, cinnamon, ginger and sugar, then slowly drizzle in the melted vegan butter.
Free Gingerbread House Template
For your gingerbread house templates, feel free to create your own or download the ones I've used here:
Free Vegan Gingerbread House Template - Part 1
Free Vegan Gingerbread House Template - Part 2
Print both pages on A4 cut them out, and then use the templates to cut out 2 of each on your rolled-out gingerbread dough to create the walls and roof pieces.
💡 Tip: If you’re using a different template, you might need more or less dough than this recipe makes. It’s a good idea to keep a few extra ingredients on hand in case you need to quickly whip up another batch. The dough is super simple and easy to scale up!
Cutting out Windows and Doors
Totally optional, but a fun way to add extra character! I skipped cutting out windows and doors for mine, but if you’re feeling creative - go for it.
Just be sure to cut them before baking so the shapes hold properly in the oven.
💡 Tips for Cutting Doors and Windows
If you want to add cut-out doors or windows to your gingerbread house, here are a few tips to help you get clean, even shapes that hold up during baking:
- Use a paper or cardboard template to cut out your window and door shapes - it’ll help keep them straight, even, and consistent across all pieces.
- Cut the outlines before baking, but don’t remove the cut-out pieces just yet. Bake the full piece with the outlines still in place - this helps prevent spreading or warping in the oven.
- Once baked, remove the baking sheet from the oven and immediately re-cut along your outlines while the gingerbread is still warm. Carefully lift out the window and door cut-outs at this point - this gives you clean edges that hold their shape beautifully.
- Feeling extra fancy? For stained glass-style windows, try placing vegan gummy bears or jelly sweets into the cut-out spaces after baking and then return the piece to the oven for a few minutes. They’ll melt into colourful, glossy “glass” panels! (Heads up: I haven’t tested this personally, but I’ve seen it done and it looks amazing.)
Step 7 - Bake the gingerbread pieces at 360°F (180°C) for 8-9 minutes. I recommend baking them in batches on the middle rack to help everything cook evenly.
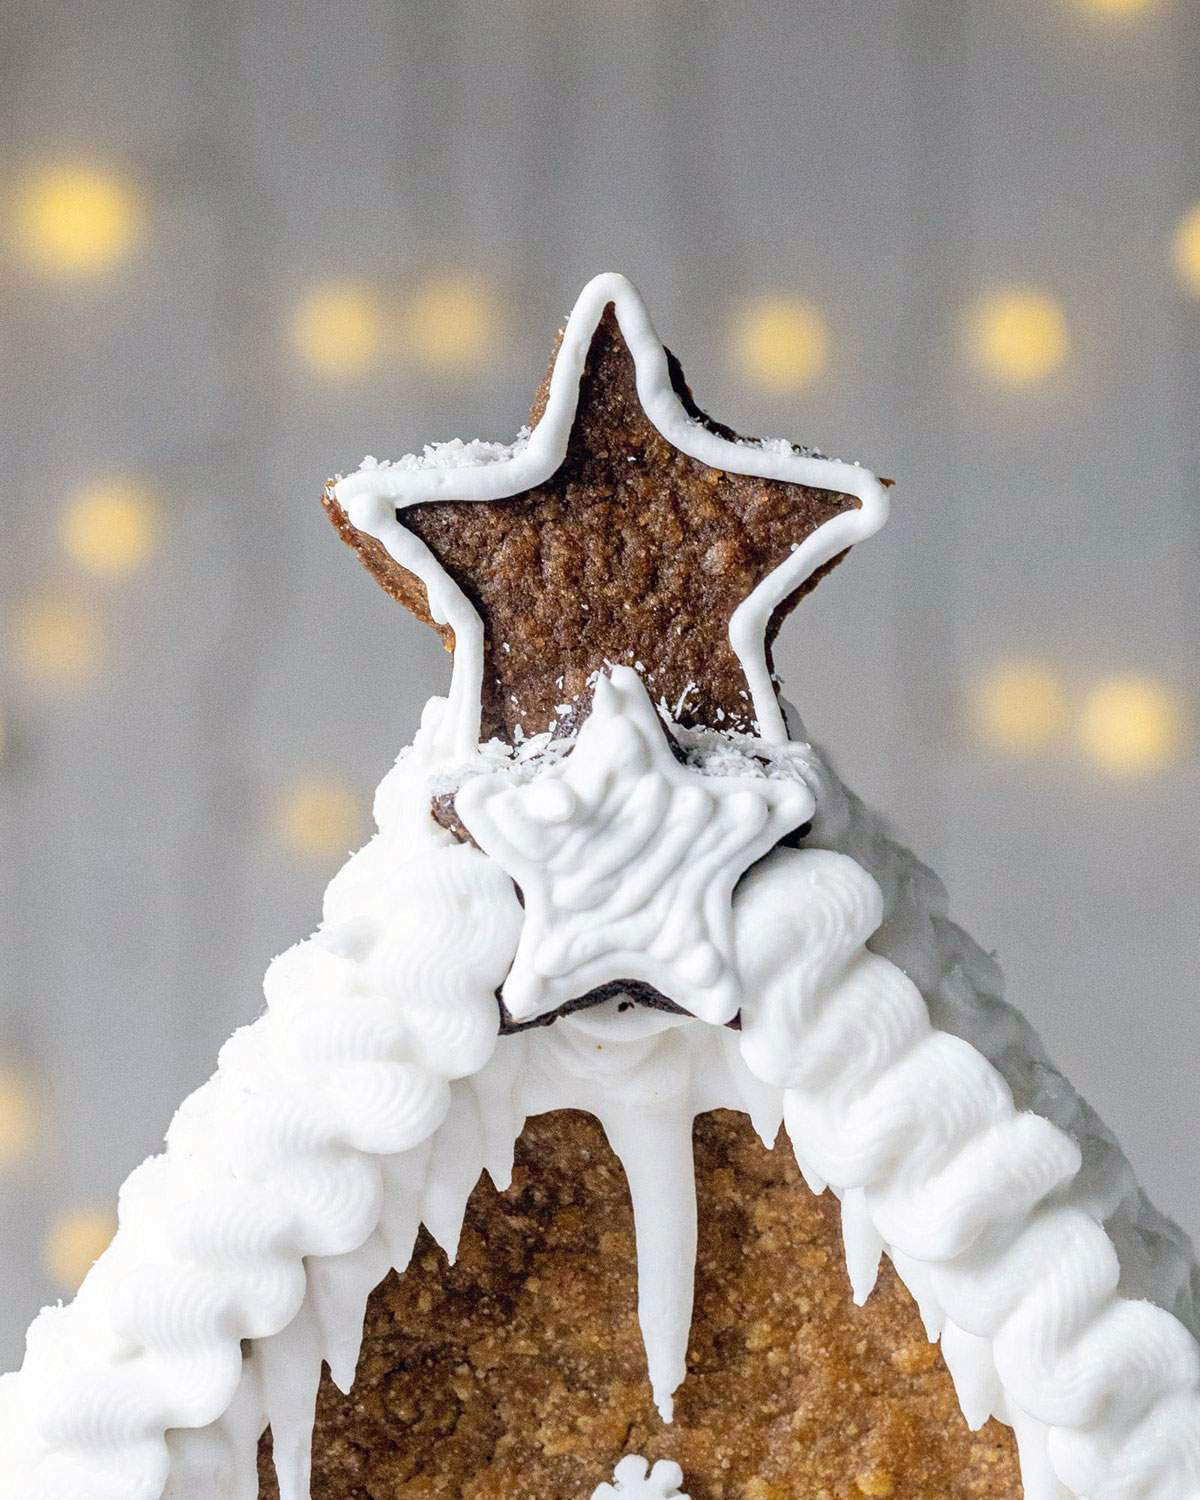
Step 8 - Use any leftover dough to create fun decorations for your house! Just roll it out the same way and use cookie cutters to make trees, stars, gingerbread people, a chimney - or anything else you fancy.
🔧 Expert Tip
Let your vegan gingerbread pieces cool and firm up completely before assembling your house - at least an hour, but ideally overnight. If you’re in a humid climate, pop them in the fridge (covered) overnight to help them dry out and hold their shape better.
How to Make Vegan Royal Icing with Aquafaba
To assemble your gingerbread house, you’ll need a strong, reliable “glue.” I use vegan royal icing made from just three simple ingredients - with aquafaba (that magical chickpea water) as the base.
Step 1 - Start by whipping the aquafaba in a large bowl using an electric hand mixer or stand mixer. Whip for about 5-6 minutes until it’s white, fluffy, and forms stiff peaks.
Step 2 - Add in the vanilla extract and quickly mix it through.
Step 3 - Gradually add your icing sugar in small batches, continuing to mix until you get a smooth, thick royal icing. The mixture should slow your whisk down as it thickens but still be smooth to work with.
Step 4 - If the icing turns crumbly, that means there’s too much sugar - fix it by adding a few drops of water until it smooths out again. If it’s too runny, add more icing sugar until it reaches the perfect thick but spreadable consistency.
How To Assemble a Gingerbread House
Building your gingerbread house is all about patience and a few handy tricks to keep everything sturdy (and less crumbly).
Here’s a step-by-step guide to make it easier:
Step 1: Prepare Your Pieces
Once your gingerbread parts are fully baked and cooled, check the edges.
If you spot any bumps or uneven bits, gently trim them with a sharp knife or a sharp grater - but be careful! You want clean edges without breaking your pieces.
Next, transfer your aquafaba royal icing into a large piping bag fitted with a round nozzle. You might need to fill two bags if your icing quantity is generous.
Step 2: Build the Walls
- Start by applying a thick line of icing along the bottom edge of the back wall, then place it on your cake board - make sure the icing side isn’t touching anything just yet.
- Add icing to the bottom and the side edge of one sidewall.
- Stand the back wall upright on the board, hold it steady with one hand, and bring the sidewall up next to it so the edges meet snugly.
- Press both walls gently but firmly onto the board and each other to set them in place.
- To help keep everything stable while drying, place tins or jars around the walls as supports.
- Repeat the same for the second sidewall.
- For the front wall, pipe icing along the bottom edge and the edges where it will meet the sidewalls.
- For extra stability, squeeze icing along the inside corners where walls meet.
Let the walls dry and set for at least one hour before moving on. Meanwhile, decorate any extra gingerbread cookies you plan to use as decorations!
Step 3: Attach the Roof
When the walls are solid and dry, it’s time to add the roof panels.
- Have a stable item nearby (like two large glasses or something similar in height to your walls) to rest the roof panels on while the icing dries.
- Pipe icing along the top edges of all the walls, then carefully place the roof panels on top.
- Squeeze extra icing into the middle seam between the two roof halves for added strength.
- Allow the roof to set for at least 30 minutes before decorating.
📌 If you love Pinterest you can pin any of the images to your boards!
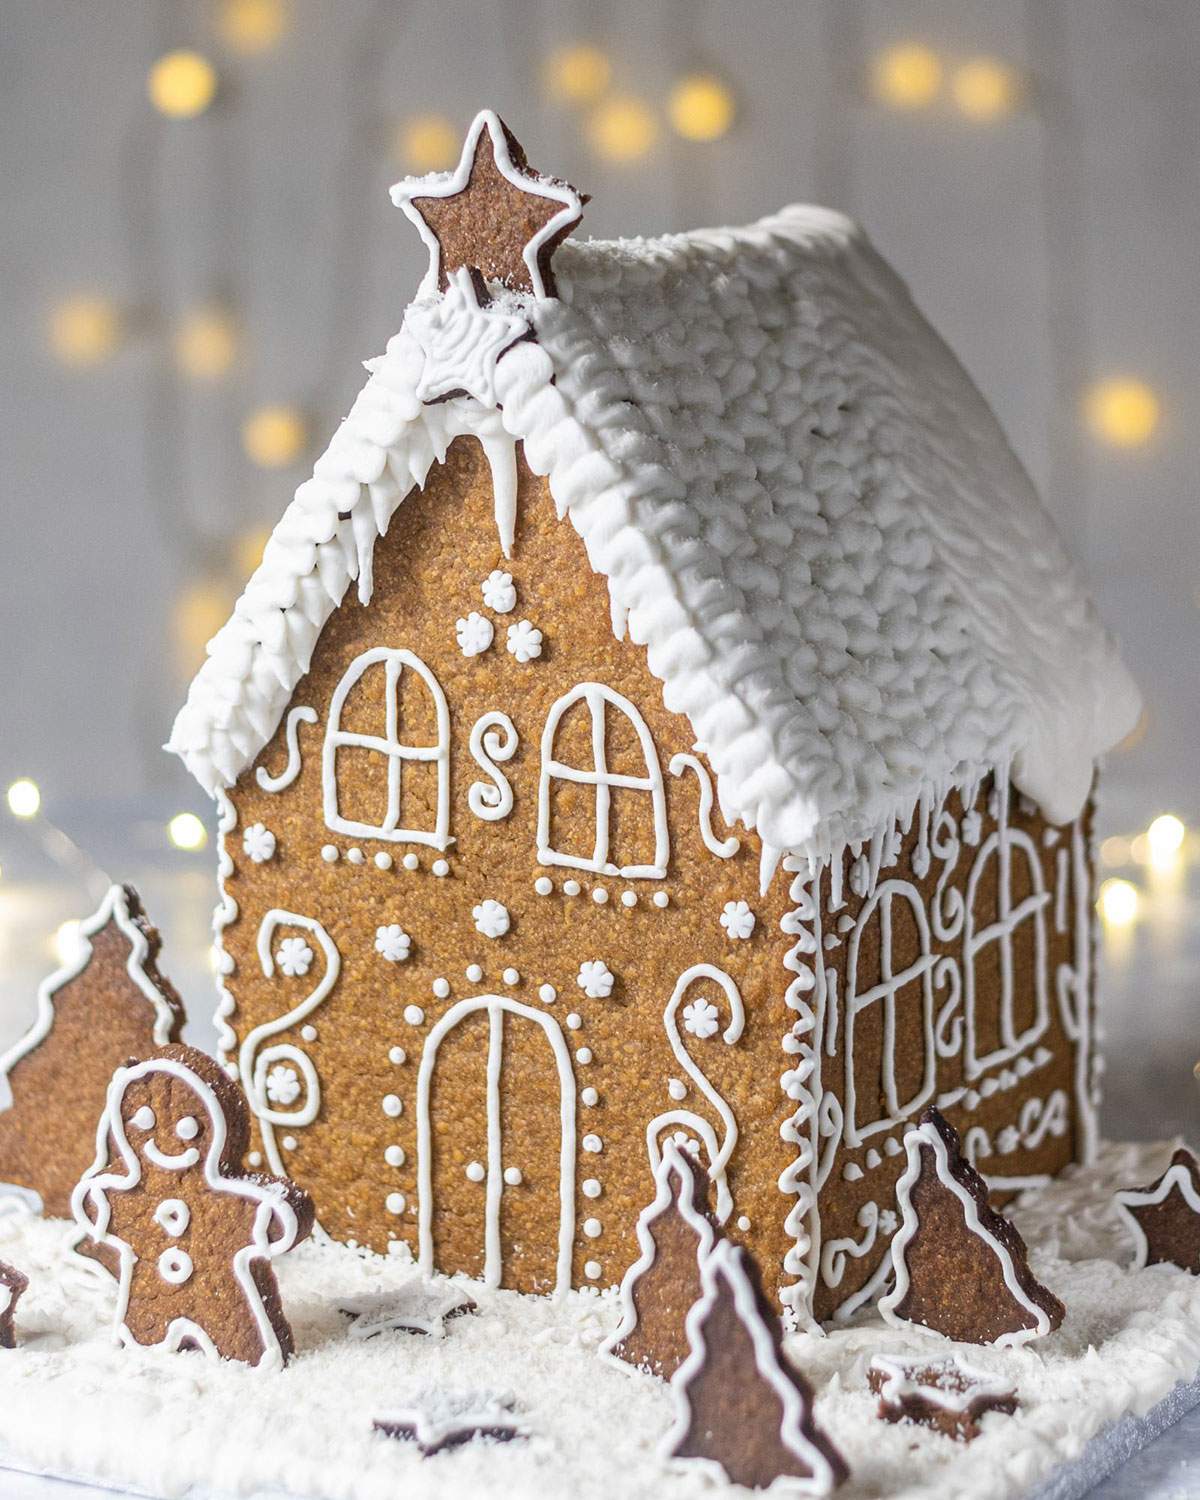
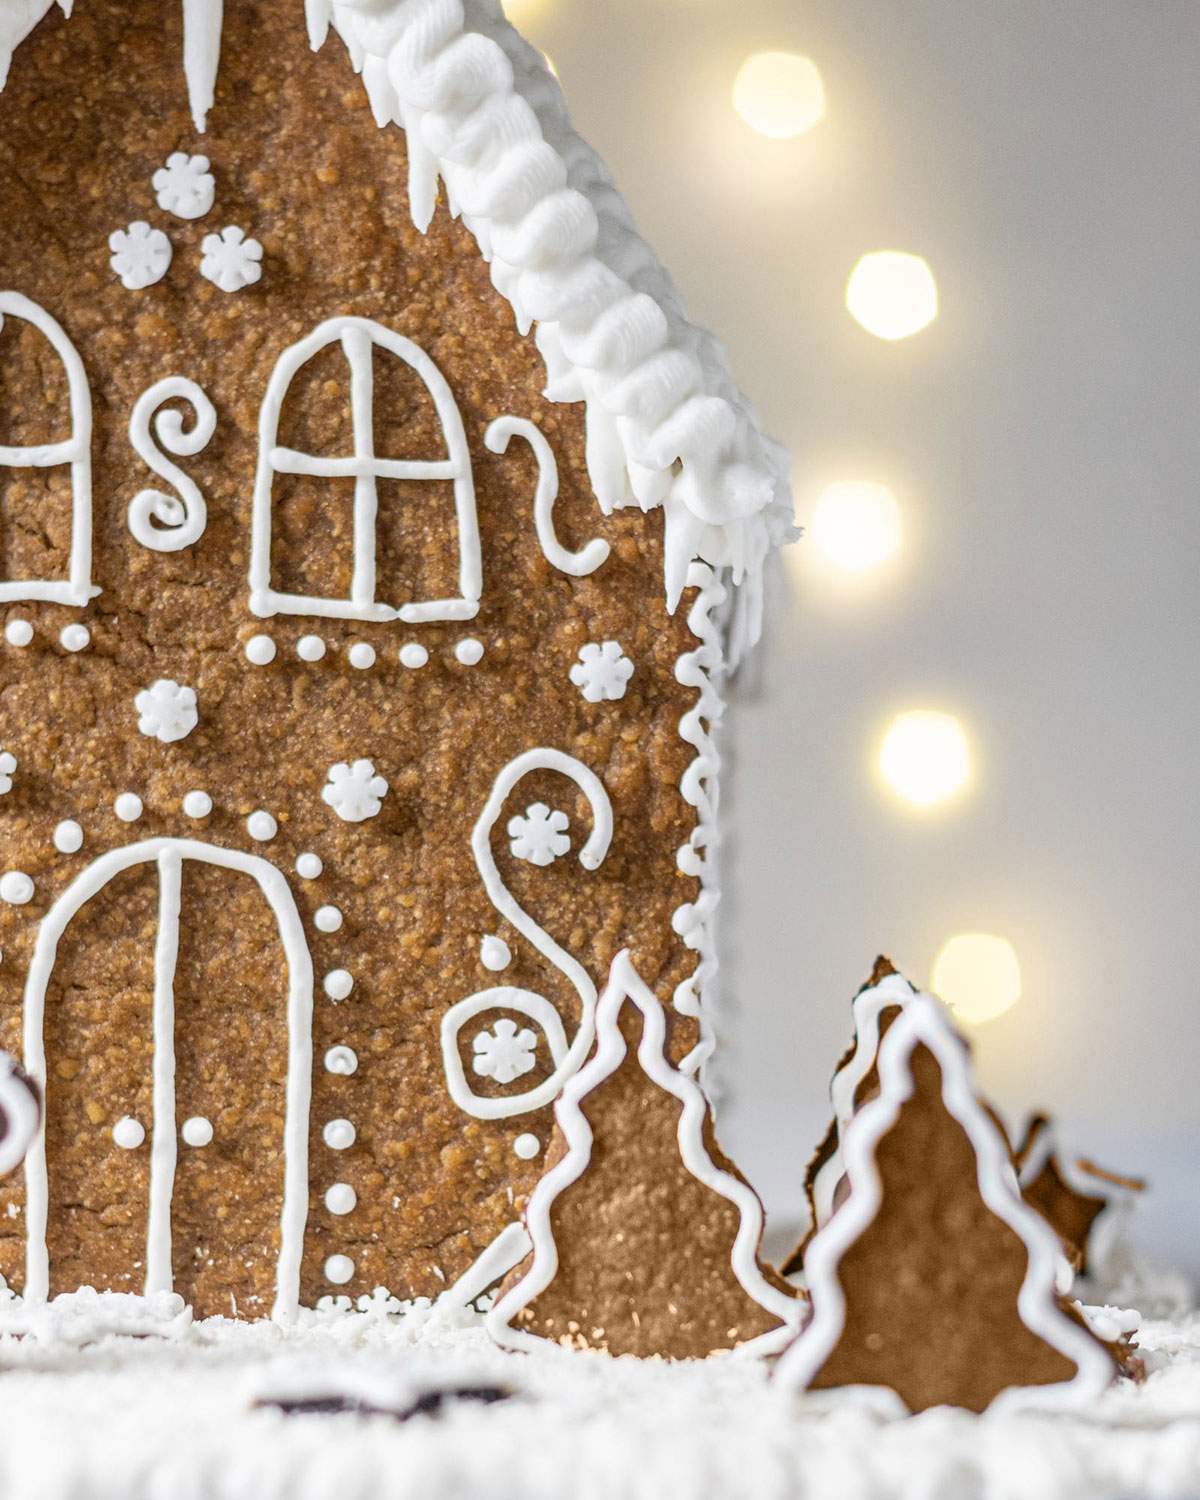
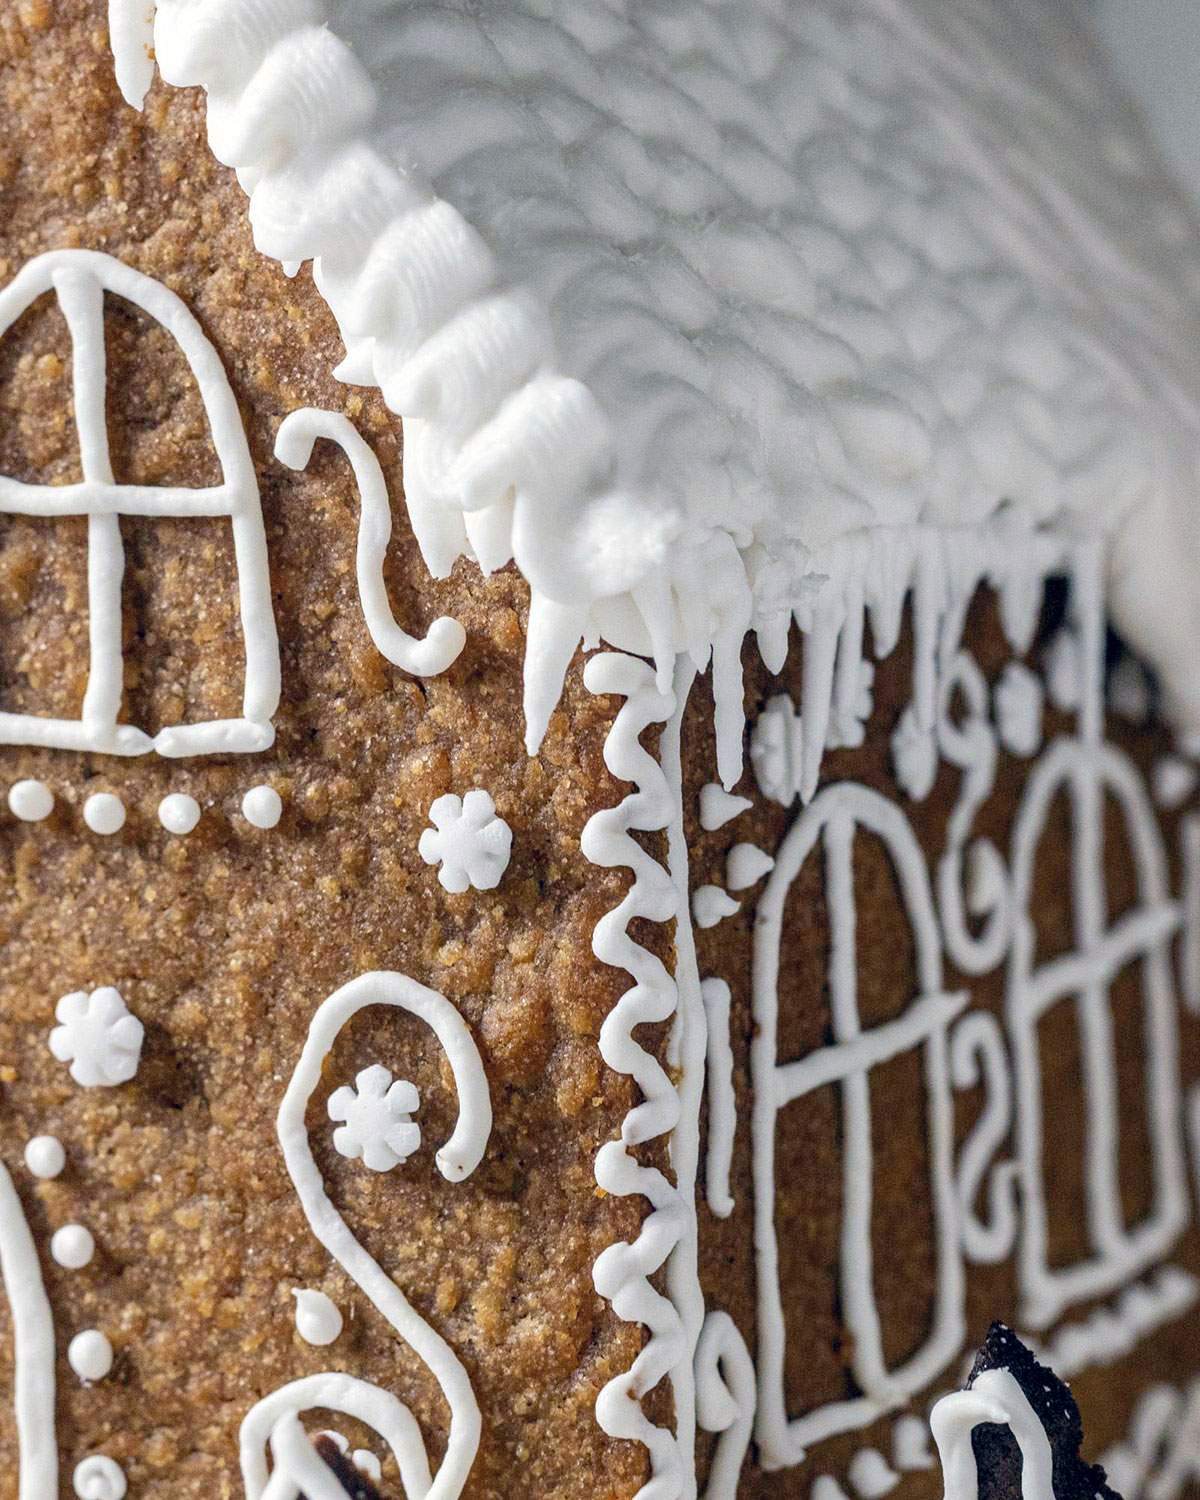
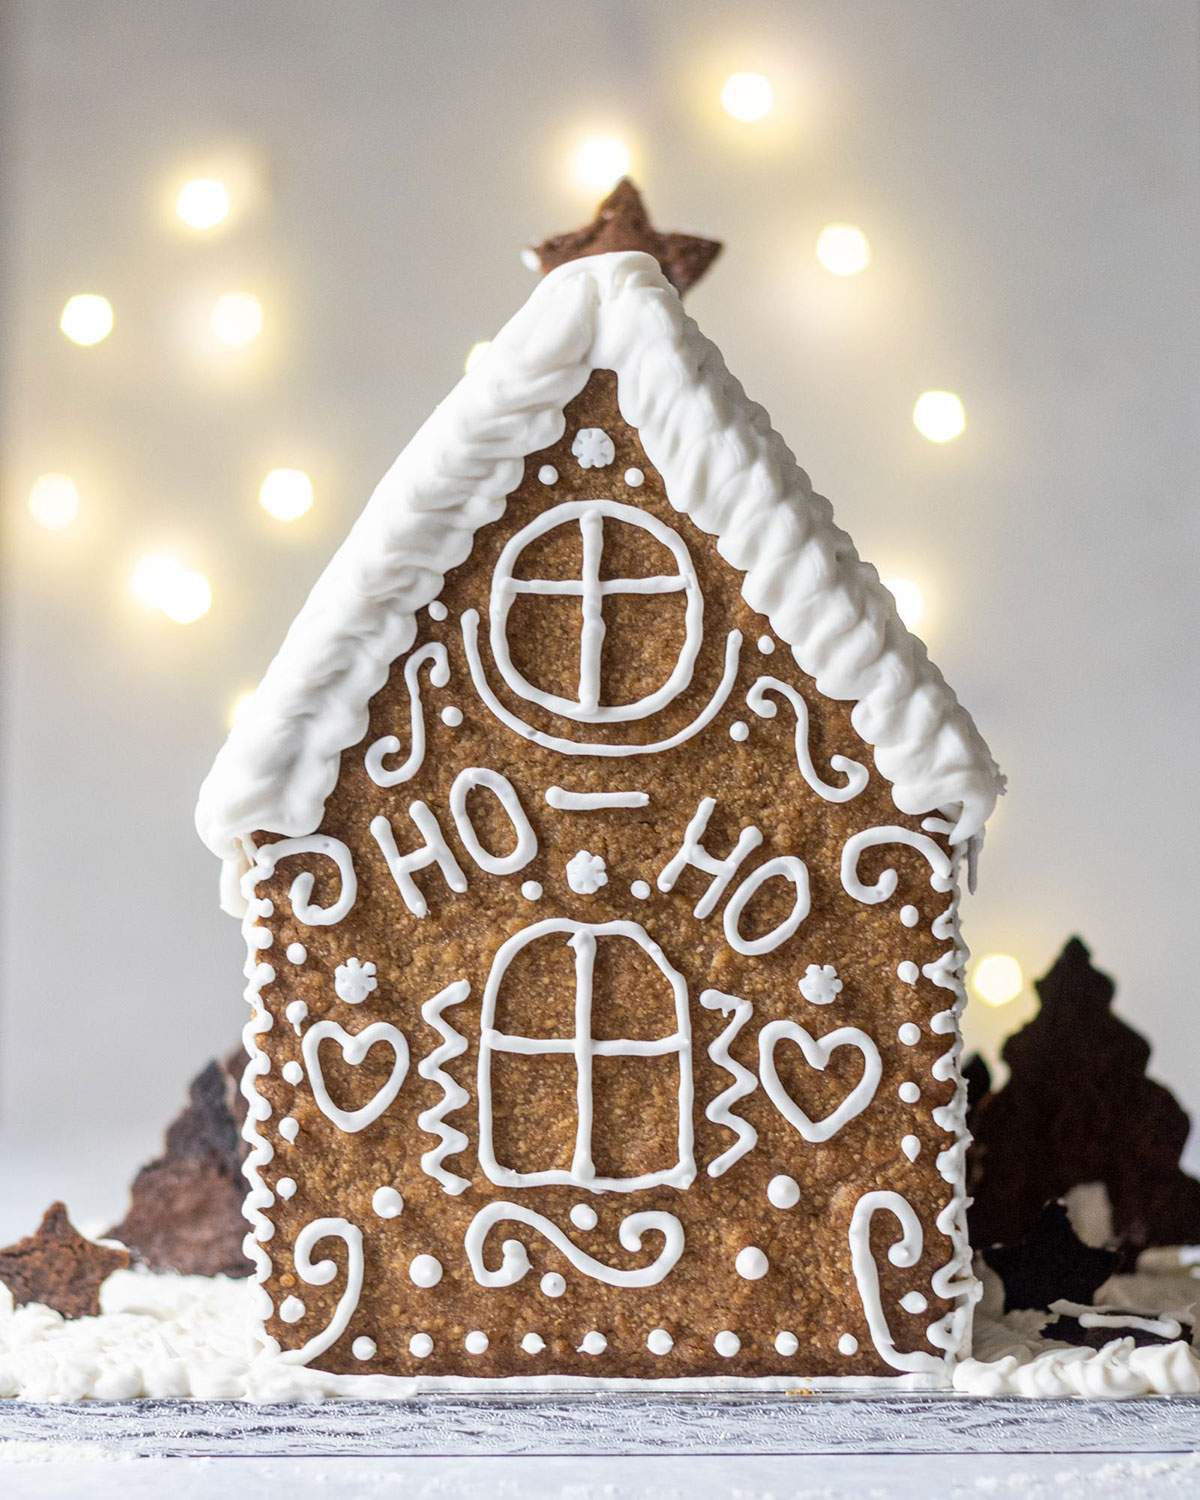
How to Decorate Your Gingerbread House
Once your house has set for at least 30 minutes, you can carefully start decorating!
I recommend beginning with the front, back, and side walls before moving on to any surrounding areas you want to dress up.
Save the roof decorations for last - that way, it gets some extra time to fully set and you avoid accidentally knocking it while working on other parts.
Feel free to get creative here! You can keep it simple with just icing like I did, or go all out with a mix of fun decorations. Here are some ideas to spark your creativity:
- Gingerbread or other Christmas cookies
- Chocolate buttons
- Colourful icing (see notes)
- Sprinkles
- Edible glitter
- Vegan Smarties
- Vegan marshmallows
- Mini Cookies
- Candy canes
Seriously, the options are endless - so have fun with it!
You might also enjoy these recipes:
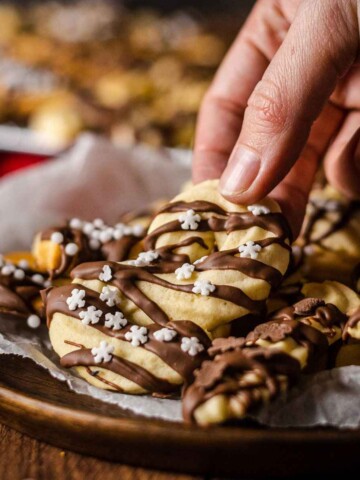
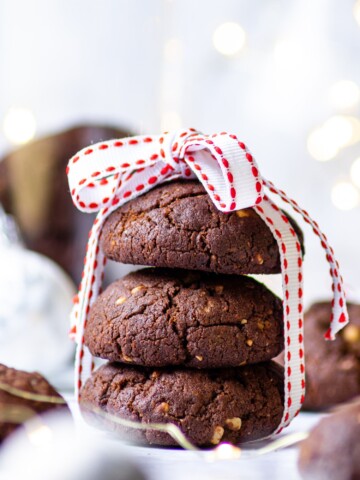

If you're looking for other fun vegan bakes to create during Christmas time, then check out this giant Vegan Cookie Cake with chocolate chips and vegan caramel or try your hands at a Vegan chocolate Yule Log!
Did you make this recipe? If so, will you do me a huge favor and leave a review and star rating & let me know how you liked this recipe? THANK YOU! ❤️
📖 Recipe Card
Vegan Gingerbread House Recipe
Equipment
- 2-3 lined baking sheets
- sharp knife
- 1 piping bag with a fine nozzle
- 2 mixing bowls
- 1 cake board a sturdy, food-safe flat surface to build your house on, like a cutting board or sturdy cardboard covered in foil
Ingredients
For the Gingerbread Base:
- 5 cups all-purpose flour (650g) plain flour
- 1 teaspoon ground ginger powder
- 1 teaspoon ground cinnamon
- 1.5 cups light brown sugar (300g) packed
- 1 cup vegan butter (250g - 2 sticks + 2 tablespoons) melted
For the Aquafaba Icing:
- ½ cup aquafaba (150 ml) liquid from an unsalted can of chickpeas
- 7-8 cups powdered sugar (900-1000g) confectioner's sugar or icing sugar
- 2 teaspoons vanilla extract
Instructions
- Preheat your oven to 360°F (180°C).
- Sift the flour, cinnamon, and ginger into a large mixing bowl. Stir in the brown sugar until evenly combined.
- Pour in the melted vegan butter and mix everything with a wooden spoon or spatula until a thick dough forms.
- Split the dough into 4 parts - it’s easier to manage in smaller portions. Roll out the first part between two sheets of non-stick baking parchment to about ¼ inch (5mm) thickness.
- Place your gingerbread house template pieces on top, cut out the shapes, and transfer them to a baking sheet. Combine any dough scraps with the next portion and repeat until you’ve cut out two of each shape.
- Bake the gingerbread house parts at 360°F (180°C) for 8-9 minutes. Remove and let them cool completely - at least 1 hour, or overnight for best results.
- Roll out leftover dough and use cookie cutters to create stars, trees, gingerbread people, etc. Bake these for 8-9 minutes and cool completely.
- Once cooled, check your gingerbread pieces for uneven edges. Carefully trim them with a sharp knife to make sure everything fits together nicely.
- In a large bowl, whip the aquafaba with an electric mixer for 5-6 minutes until stiff peaks form. Add vanilla and gradually mix in the powdered sugar. You’re aiming for a thick, pipeable consistency - adjust with a little more sugar or a splash of water if needed.
Assemble the house
- Transfer your icing into a large piping bag with a round nozzle.
- Start with the back and one side wall. Pipe icing along the bottom of the back wall and carefully set it aside.
- Pipe icing along the bottom and one edge of a side wall, then stand both walls upright on your cake board with the edges touching. Gently press them together. Use tins, mugs, or jars to prop up the walls if needed while drying.
- Repeat with the second side wall and the front wall. For extra strength, pipe icing into the inside corners.
- Let the walls set for at least 1 hour. In the meantime, decorate your cookies!
Add the roof
- When the walls are dry, pipe icing along the top edges of the house.
- Place the roof panels on top, resting them on something stable (like jars or glasses) while they set.
- Pipe a generous line of icing along the top seam where both roof halves meet. Let the roof set for at least 30 minutes.
Time to decorate
- Start with the front, back, and sides of your house. Get creative! Use icing, sprinkles, candy canes, vegan marshmallows, cookies, chocolate buttons, edible glitter - whatever you love.
- Move on to the surrounding cake board (if decorating it), and save the roof for last to avoid bumping it while working.
Notes
- 💡 Use a kitchen scale if you can! It's much more accurate than cups and helps ensure the recipe turns out just right - especially for gingerbread dough and icing.
- 🧁 Aquafaba measurement refers to the liquid before whipping.
- 🎨 If you want colored icing, use gel food coloring for bold, vibrant shades. If using liquid coloring, reduce the amount of aquafaba slightly or add more powdered sugar to balance out the texture.
- ❄️ If you're in a humid climate, let the gingerbread cool and harden overnight in the fridge (covered) before assembling.
- 🍬 Icing quantity will depend on how much decorating you plan to do. This full recipe includes enough to assemble and fully decorate the house plus the cake board. If you're going minimalist, start with half or even a quarter batch and scale up as needed.
- 📉 Nutritional values are an estimate and will vary depending on your decorations and specific ingredients. Values based on approx. ⅛ of the finished house.
Love festive bakes? Make sure to also check out these:
© 2026 Romy London / Romina Callwitz | All images, videos, wordings and content are copyright protected and belong to Romina Callwitz. Please do not use any of my content without prior permission. If you wish to re-publish any (part of my) content, please get in touch via email. Thanks for your support!
*Disclosure: This page may contain affiliate links and sponsored links that earn me a small commission, at no additional cost to you. You can find more information in my Privacy Policy.


Jessica says
made this on the weekend and it worked an absolute treat! finally a recipe that doesn't require me buying molasses that I'll otherwise never use again, fab!
Karin says
worked out so wonderfully, thanks for the recipe!