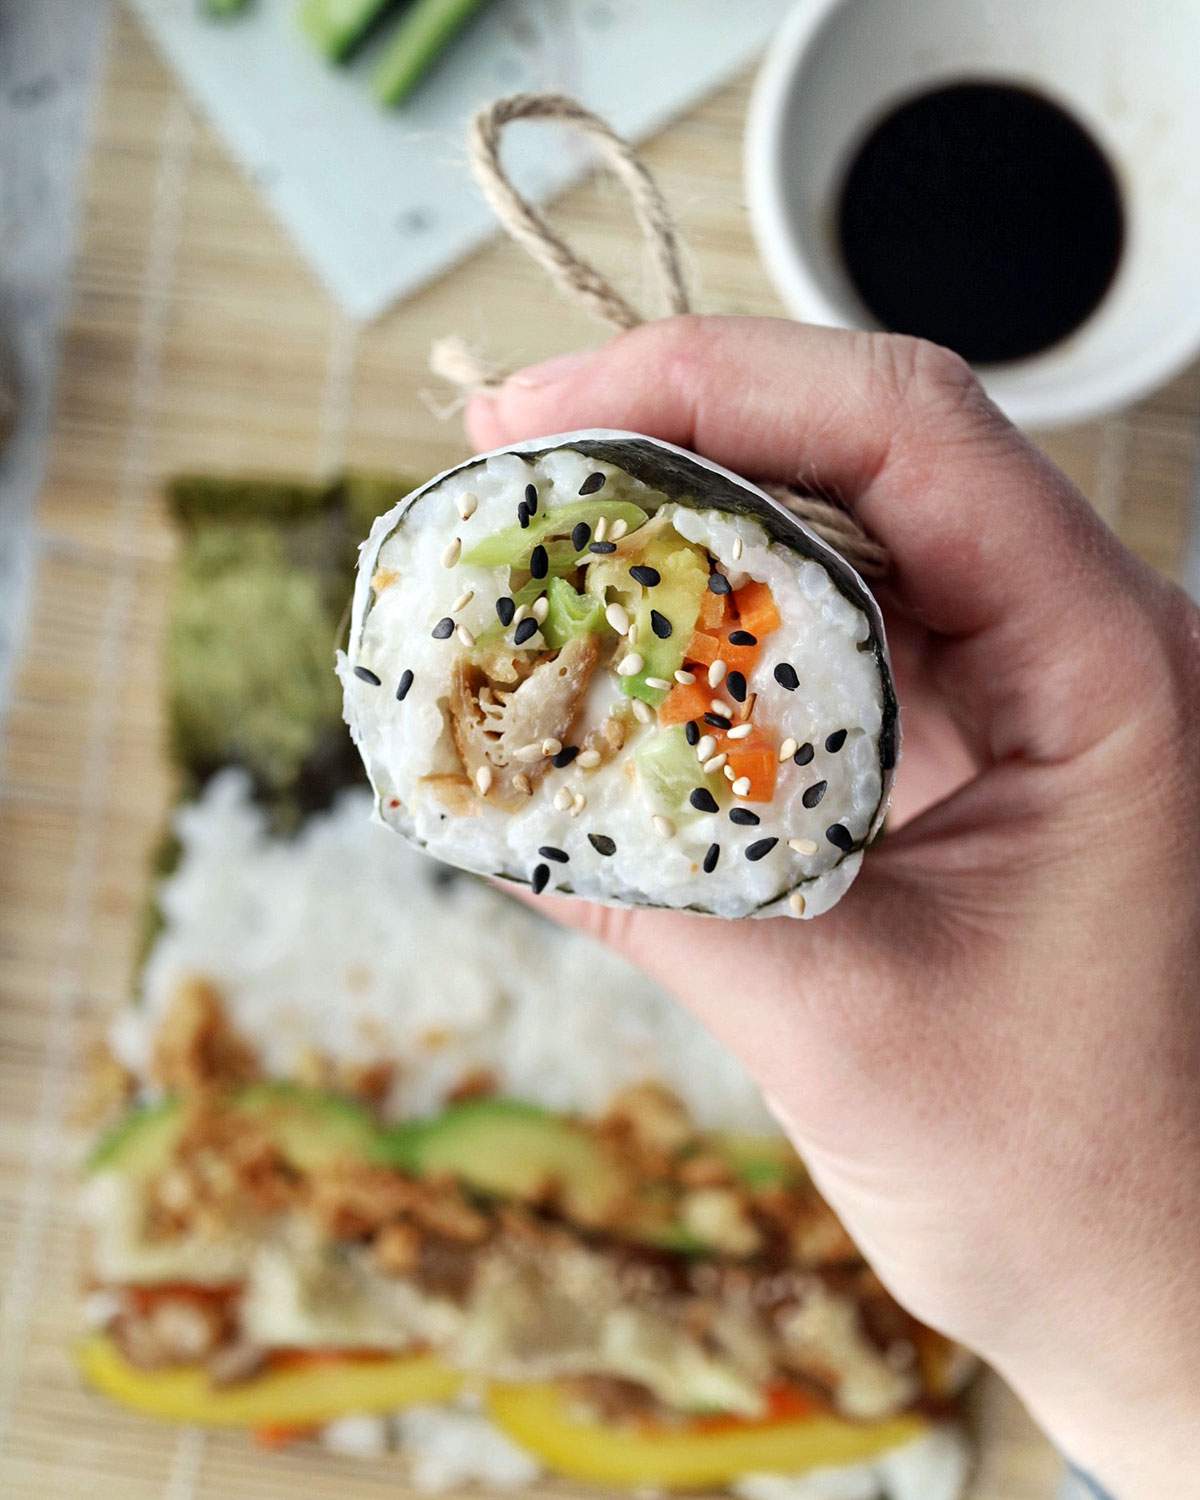
Vegan Sushi Burrito Recipe - the ultimate fusion of deliciousness! Made with avocado, ginger, soy sauce, Nori, and Oumph!
Vegan Sushi Burrito
If you love sushi and have been looking for the perfect way to enjoy it as part of your lunch box (or simply at home!), then my recipe for this vegan sushi burrito has you covered!
Have you ever tried Happy Maki? Those of you who regularly visit vegan trade shows have probably stumbled across these vegan sushi gods from Brighton and I have honestly been obsessed with Sushi Burritos ever since I first tried a Happy Maki at Vegfest 3 years ago.
My home-made vegan sushi burrito has recently gotten a Korean twist, however: Since the lovely Emma, who's half Korean half Scottish, joined our team, she's shown me so many Asian cooking hacks (that I am seriously grateful for)! She showed me how tasty sushi rice can be when you add a little Toasted Sesame Oil to it - OH MY GOD, I'm obsessed! So this was also what I added to my sushi rice on this occasion, and to complete the flavour profile, I also cooked my Oumph! in Toasted Sesame Oil - PURE YUM!
What you'll need to make this Vegan Sushi Burrito
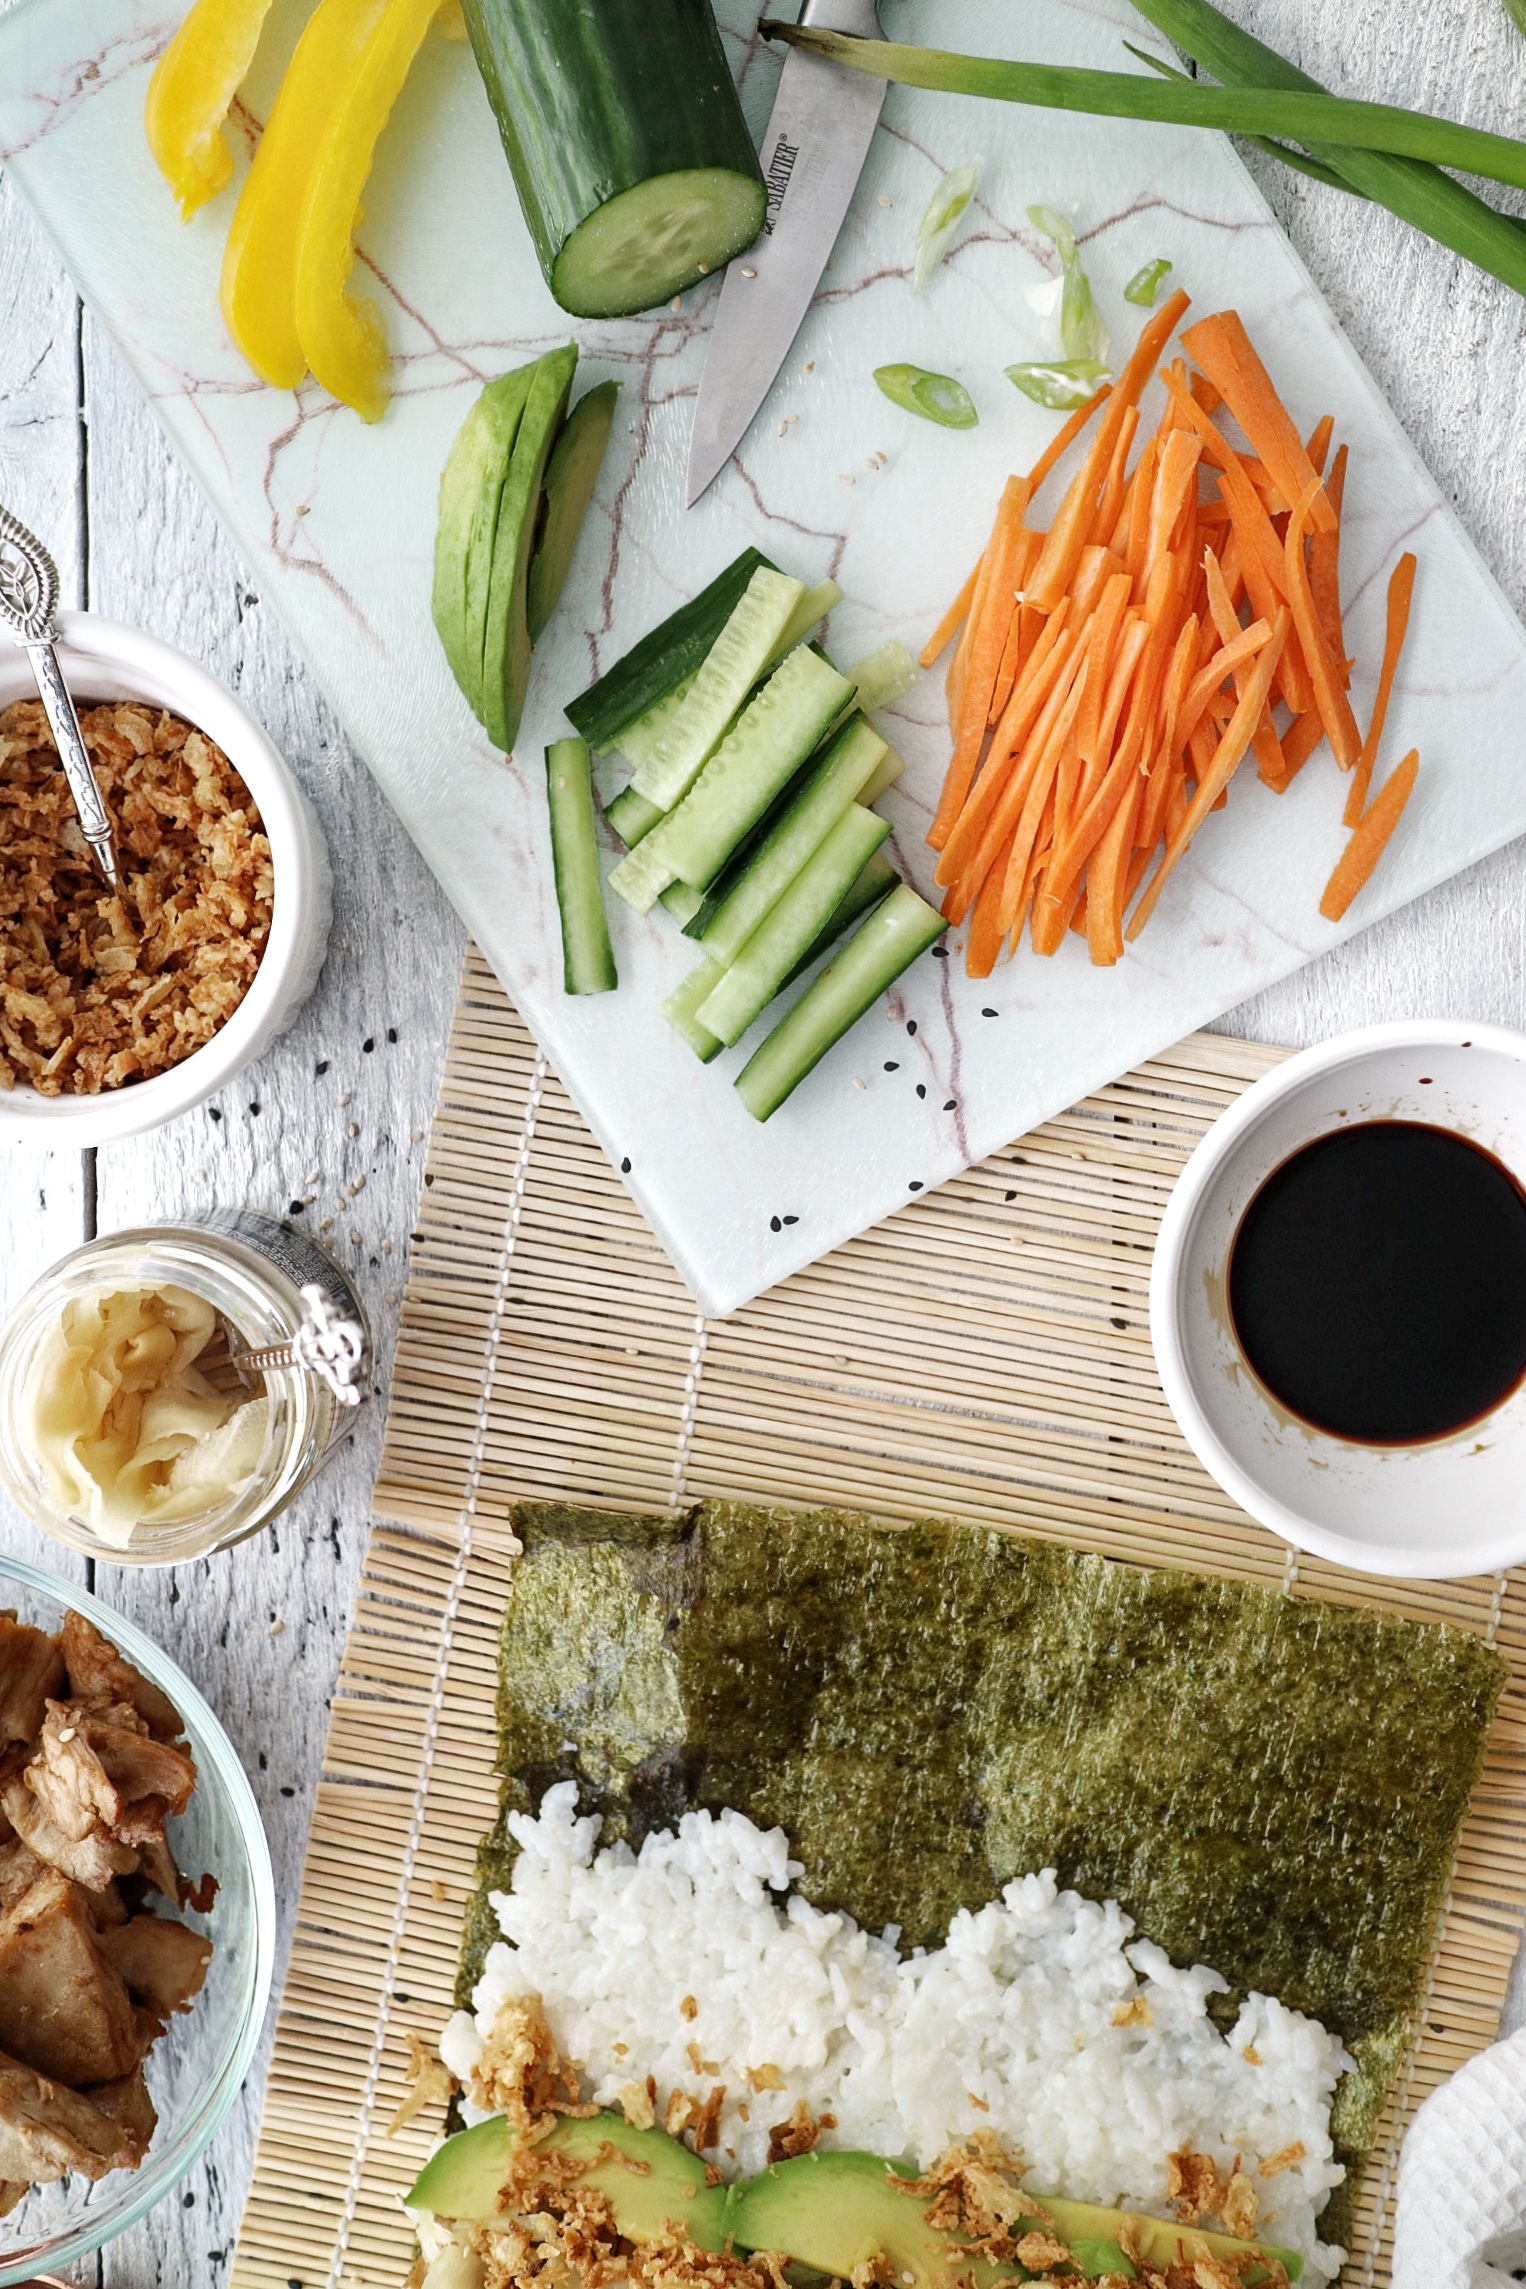
Ingredients
- Nori Sheets
- Oumph! The Chunk
- Japanese Sushi Rice
- Toasted Sesame Oil
- Tamari Soy Sauce
- Vegan Mayonnaise
- Carrots
- Yellow Bell Pepper
- Avocado
- Spring Onion
- Black and/or white sesame seeds
- Cucumber
- Pickled Ginger (optional, amount down to personal preference, I love it gingery!)
- Crispy Onions
- Soy Sauce (for dipping)
You might also need:
- Sushi mat - as an alternative you can use baking paper or plastic wrap
- Baking paper to wrap your vegan sushi burrito
- Large sharp knife
- *Optional: Ribbon to keep the burrito in one piece whilst eating
How to make Vegan Sushi Burrito Recipe
Prepare your rice
Firstly you'll want to wash your sushi rice, there are two ways of doing this:
- Rinse your rice in a sieve under the tap.
- Fill a saucepan with water and use your hands to massage the grains of rice. Be sure to drain the water after washing!
Your rice is now ready to be cooked, so put it in a saucepan and add hot water from the kettle.
Extra Tip: If you want your rice to cook perfectly, then you'll want the water to rice ration to be 2:1. This means if you cook 1 cup of rice, you should cook it in 2 cups of water.
Bring the water to a boil and then take the heat right down to the lowest it can be and put a lid on the pan allowing the rice time to cook. Be sure to check your rice and stir it every couple of minutes to make sure it's not sticking to your pan.
Once it's cooked, you should have a nice mass of sticky rice for your burrito. Take the pan off the great and let the rice cool down.
Extra Tip: To help your rice cool down faster, I often put the pan in a bath of cold water, you've just got to make sure that the cold water doesn't spill into the pan full of rice!
Cooking your Oumph!
To save time, you can do this whilst you're cooking your rice...
Get your Oumph! from the freezer and put it all in a frying pan on a medium heat with 2 tablespoon of toasted sesame oil and 2 tablespoon of Tamari - this will give it a little Asian-fusion flavour! Once you see that it's cooked and is a little crispy on the outside, take it off the heat and set it aside to cool.
Chopping your veg
As your Oumph! and rice are cooling down somewhere, wash, peel and chop your carrot, pepper and cucumber into long, thin strips.
Then get your spring onion and cut it in parallel strokes to create thin circles of spring onion.
For the avocado, cut it in half, take out the stone and peel off the outer skin - you might be able to use a spoon to scoop it out in one. Then place the avocado halves onto your chopping board face down and cut into 2mm thin strips.
Rolling your burrito
Once your rice and Oumph! have cooled down we can get wrapping!
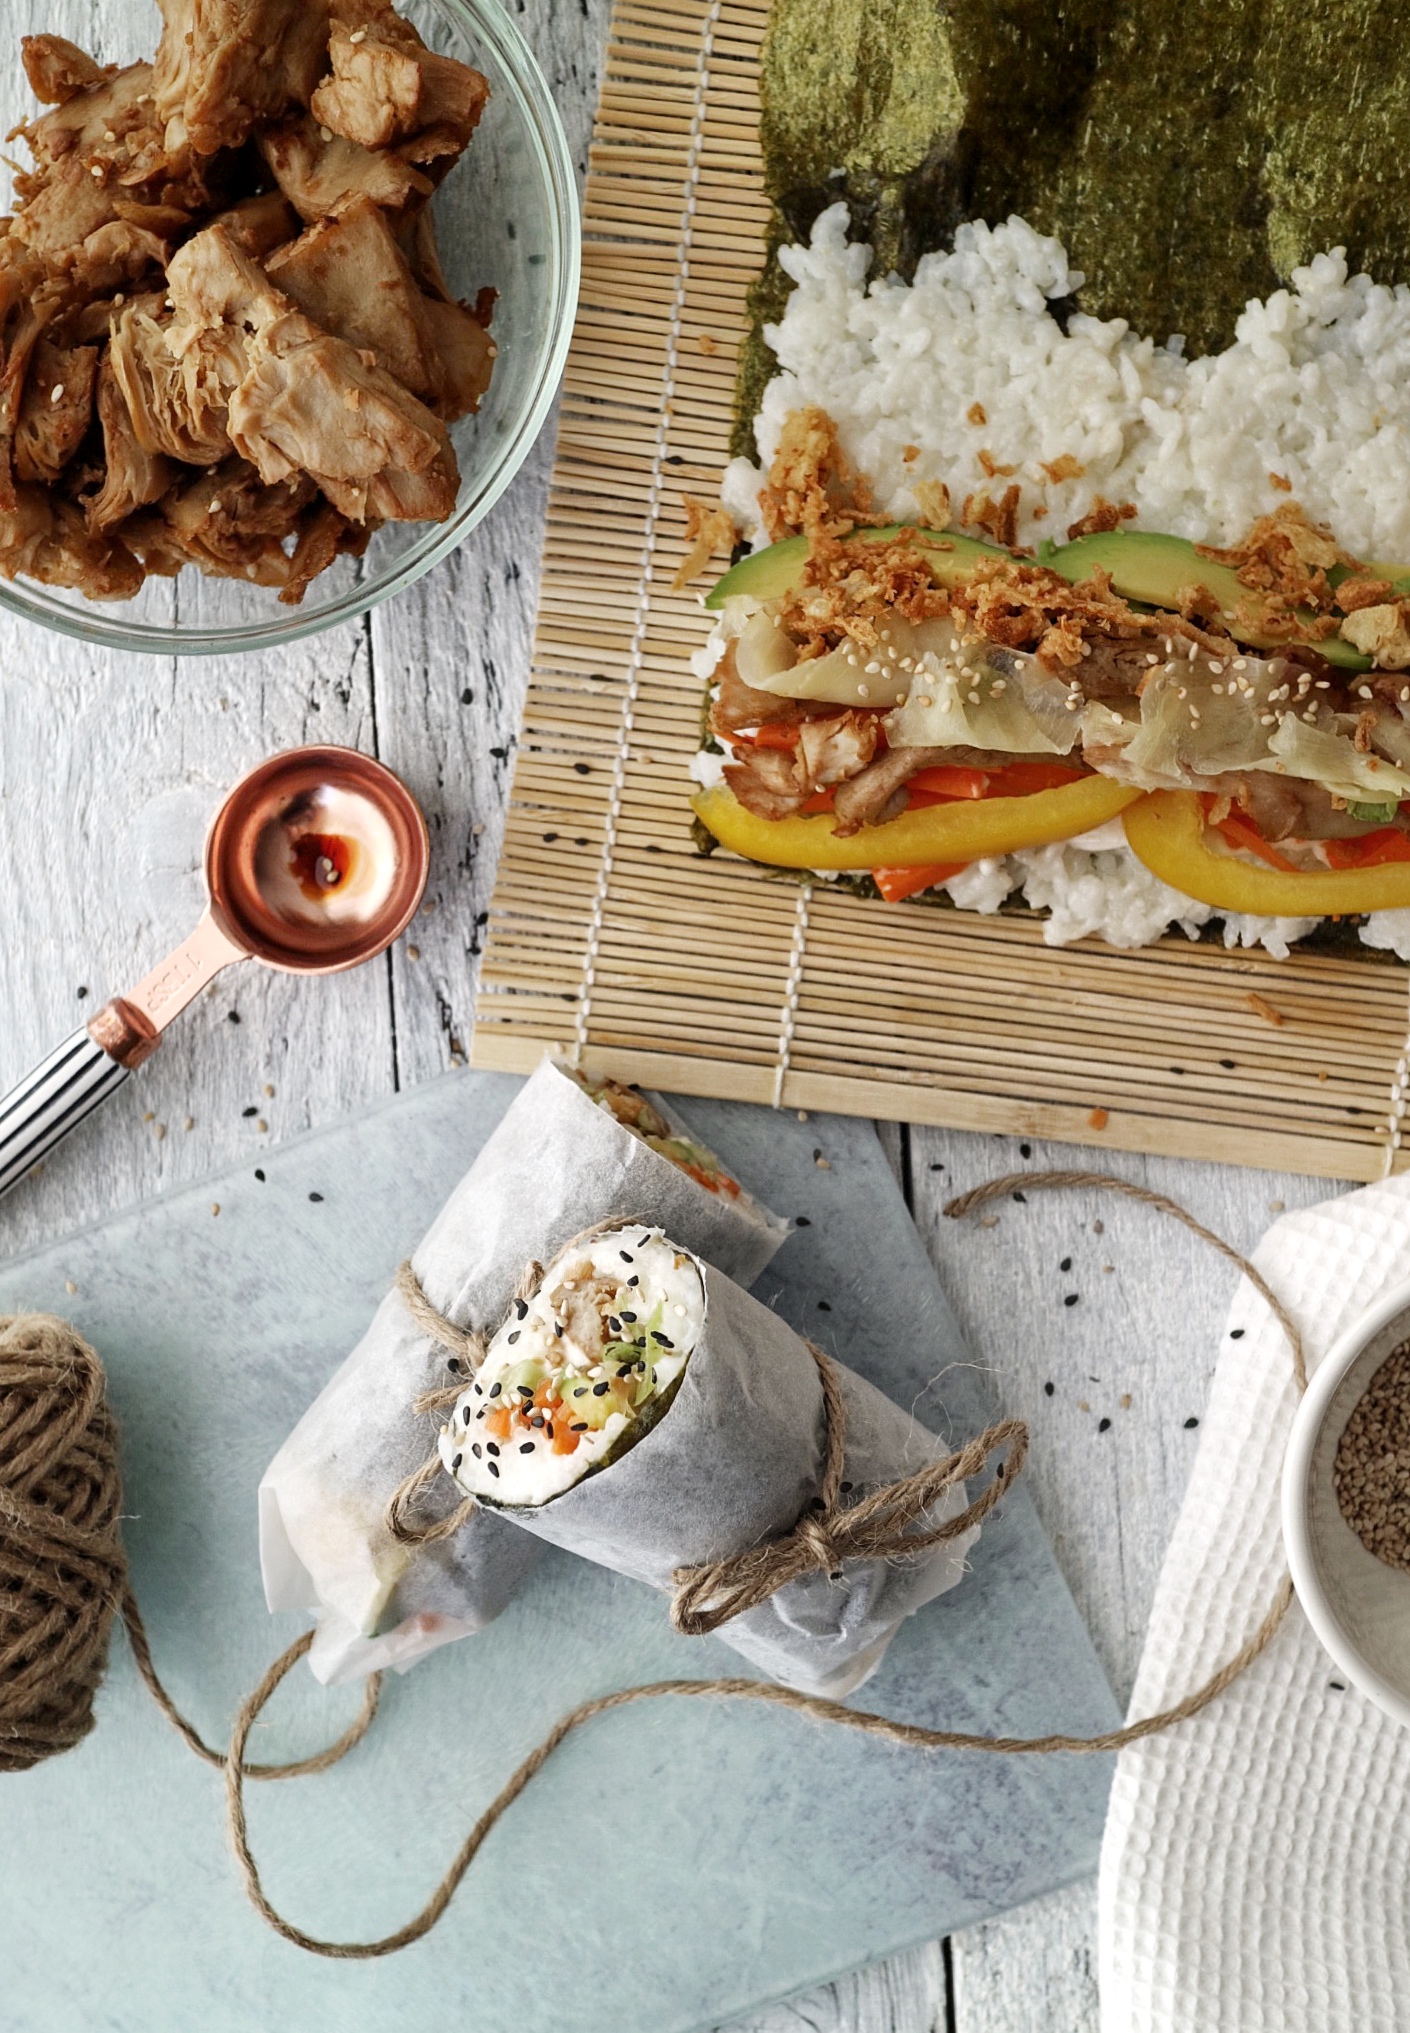
To start with, place your Nori Sheet on the sushi mat and add a layer of rice to the bottom 3 quarters of the sheet. I'd recommend spreading it evenly with a wet spoon or a knife to ensure you get an even layer.
Now place your other ingredient on the bottom edge of your Nori. I did it in this *order:
- Vegan mayonnaise
- Carrot
- Pepper
- Cucumber
- Oumph!
- Avocado
- Ginger
- Crispy onion
- Spring onion.
*Of course, you can place your ingredients however you feel like 😉
Now you've got all your ingredients together, tap the top quarter of your Nori sheet (the bit with nothing on it) and carefully roll the burrito from the bottom.
Extra Tip: Use your middle and ring fingers to keep the filling in place whilst you roll the sushi mat with your thumbs.
Now that all your ingredients are in the roll, gently press the burrito within the sushi mat to make it nice and firm, which will help ensure the filling doesn't fall out later on.
Roll the rest of the burrito gently and seal the Nori edge with a little water then unroll the sushi mat and carefully roll the burrito on top just to even it out a little.
Ready to serve
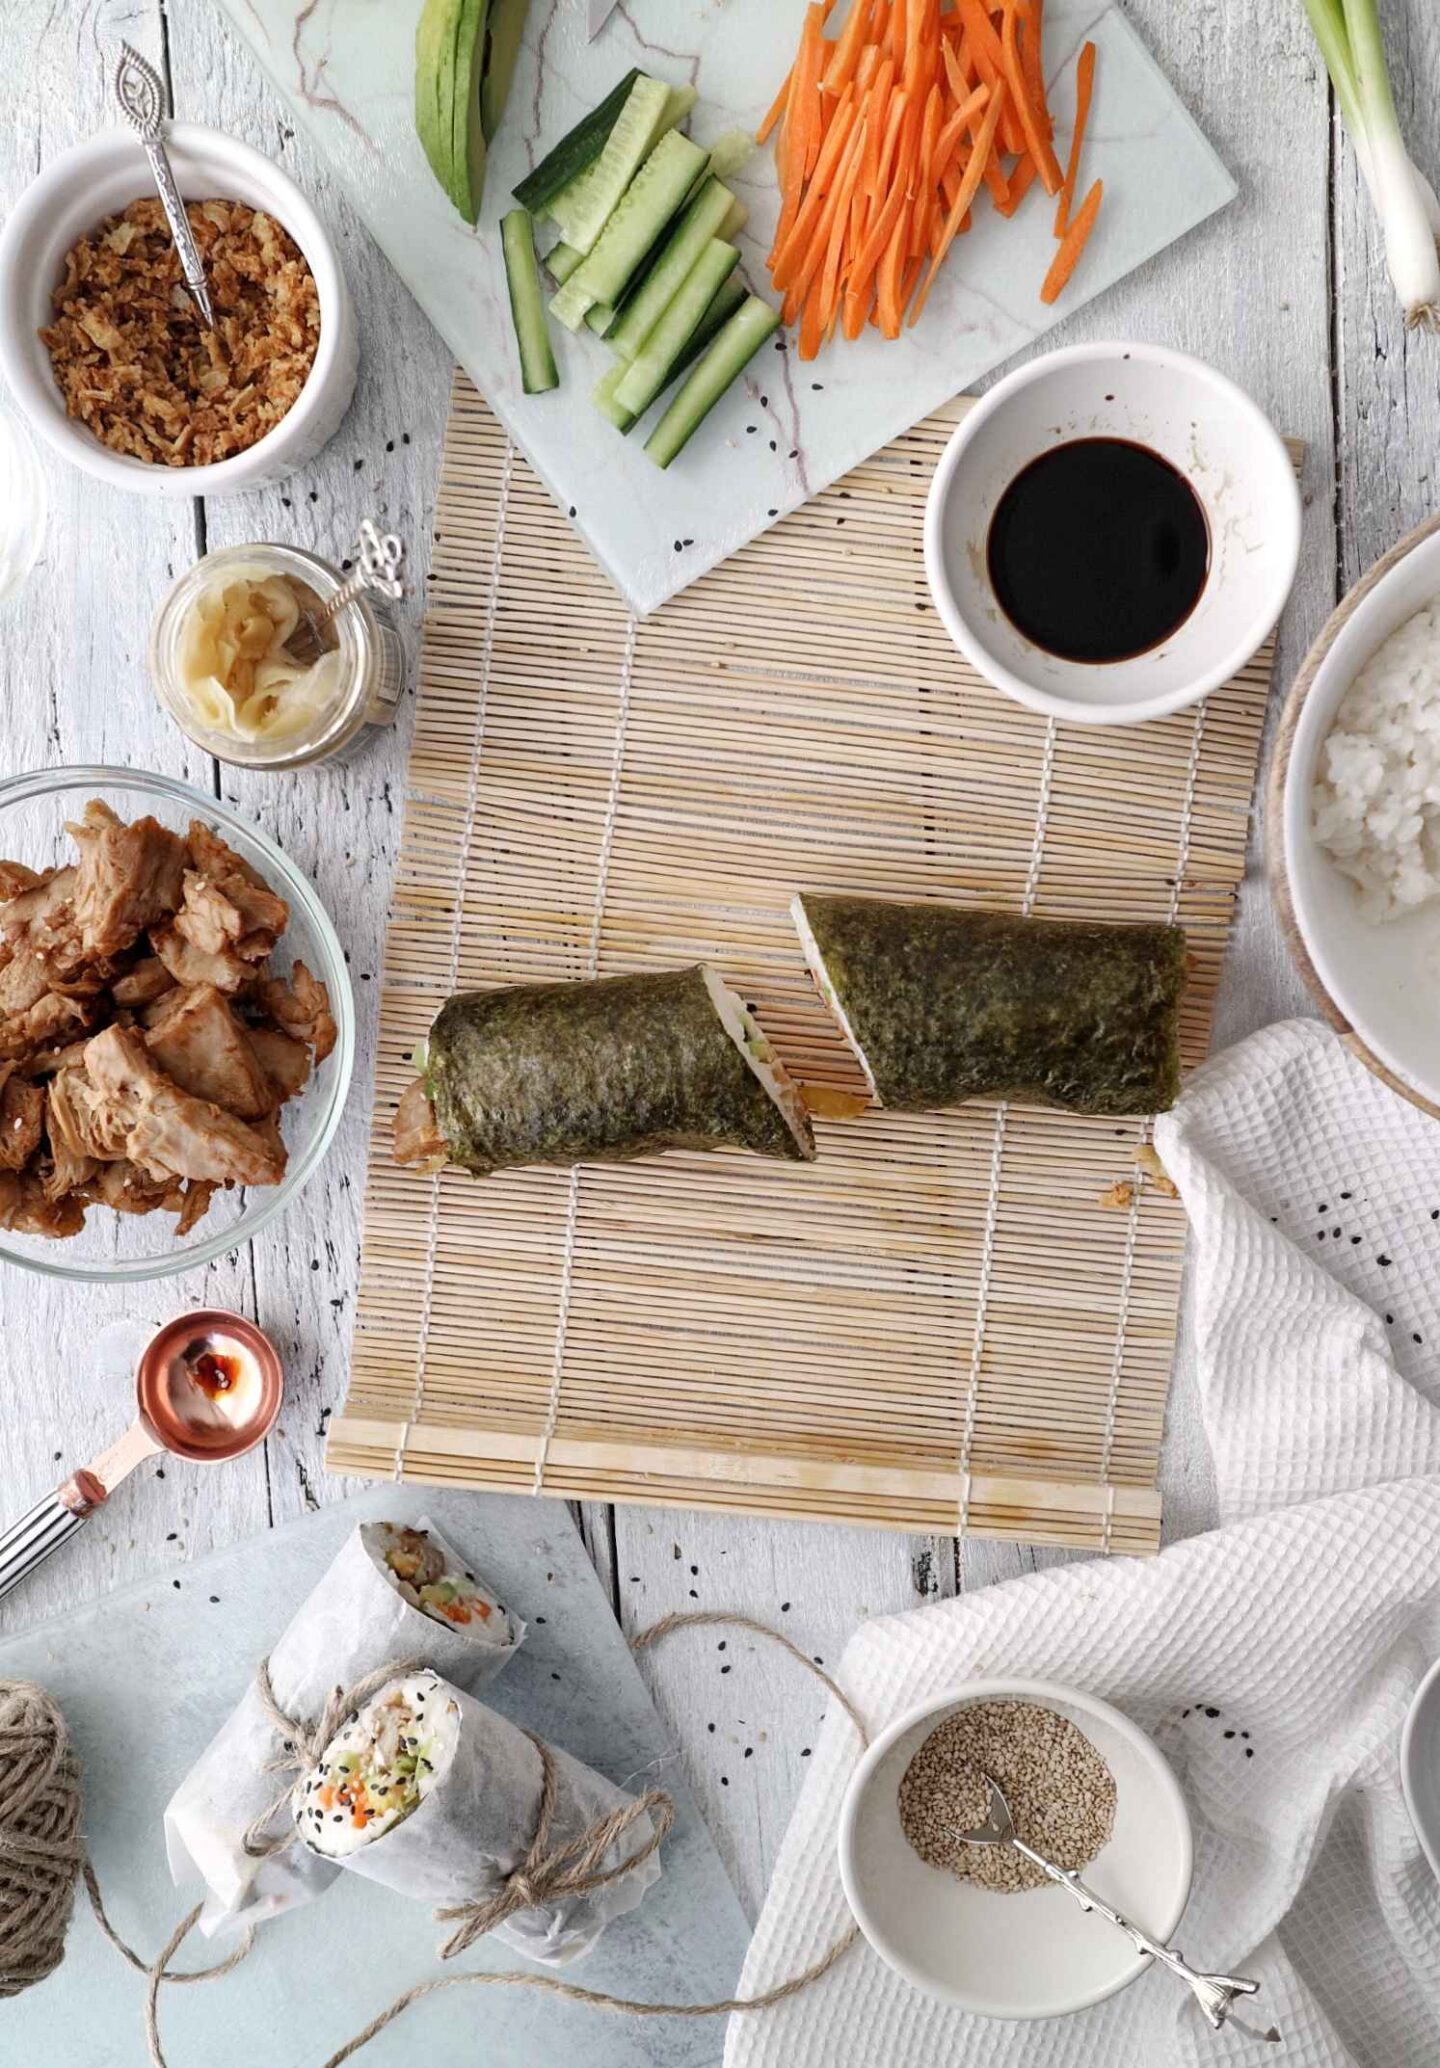
Using a sharp (and wet) knife, cut your burrito in half.
Extra Tip: If you're making and cutting more than one burrito at the same time, be sure to clean and wet your knife in between cutting each burrito. If there's any sticky rice on your knife it will be harder to cut.
If you're using parchment paper to hold your burrito together, wrap it around the roll before cutting.
Finally, if you're a fan of sesame seeds (like I am!) sprinkle some over each halve, dip in soy sauce and enjoy!
This recipe is:
- 100% vegan
- Super tasty
- Surprisingly fishy
- simply delicious
- easy to make
- egg-free
- dairy-free
You might also enjoy these recipes:
📌 If you love Pinterest you can pin any of the images to your boards!
📖 Recipe Card
Vegan Sushi Burrito
Equipment
- 1 sushi mat
- 1 chopping board
- 1 sharp knife
- 1 small bowl with water
Ingredients
- 4 nori sheets
- 1 portion vegan chicken-style pieces store-bought or homemade
- 200 g sushi rice
- 4 tablespoon toasted sesame oil
- 4 tablespoon vegan mayonnaise
- 2 medium carrots finely sliced, cut julienne
- 1 yellow bell pepper finely sliced
- 1 avocado thinly sliced
- 1 spring onion
- 2 tablespoon black or white sesame seeds
- ½ cucumber cut into thin strips
- 1-2 tablespoon pickled ginger
- 4 tablespoon crispy onions
- soya sauce for dipping
Instructions
- Start off by washing your sushi rice – you can either do this by rinsing it in a sieve under the tap or by filling a pan with water and massaging the rice kernels with your hands. Drain the water after rinsing, place the wet rice into a pan & add hot water from the kettle. To cook the rice perfectly you will need the water/rice ratio to be 2:1 – so add twice as much hot water as rice. Bring the water to a boil, then reduce the heat to a minimum, cover the pan with a lid and leave the rice to cook. Check back and stir every 2-3 minutes, so to ensure that the rice does not stick to the bottom of the pan. Your sushi rice should become a sticky mass for your vegan sushi burrito.
- Remove the pan from the heat and let the sushi rice cool down. I usually place the pan into a bath of cold water in my sink to help cool the rice down quicker (obviously don't overflow it 😉)
- Whilst your rice is cooking you can prepare your vegan chicken pieces. Place them into a frying pan over medium heat. Add 2 tablespoons of sesame oil and 2 tablespoons of tamari to the pan and fry until well coated and slightly crisping on the outside. Set aside to cool.
- Wash, peel and chop the carrot into thin, long strips, and cut the bell pepper & cucumber in the same way. For the spring onion: Cut it in parallel strokes to create thin circles of spring onion. Cut the avocado in half, remove the stone and carefully peel the outer skin. Place the avocado halves onto your chopping board face down and cut into 2mm thin strips.
- Assemble all your ingredients and we can begin to fill the burrito!
- Place your Nori Sheet on the sushi mat. First, create a layer of sushi rice on the bottom ¾ part of your Nori. Ideally spread with a wet spoon or knife to create an even layer.
- Place your ingredients along the bottom edge of your Nori, I added them in this order: vegan mayonnaise, carrot, pepper, cucumber, chicken pieces, avocado, ginger, crispy onion, spring onion. Of course, you can alter this order to your liking 😉
- Tap the top quarter of the Nori sheet with a little water, then carefully start rolling the burrito from the bottom. Use your middle and ring fingers to keep the filling in place, whilst you roll the sushi mat with your thumbs. Once you’ve got all ingredients in the roll, gently press the burrito within the sushi mat to create a firm roll and avoid your filling to fall out later on.
- Gently roll up the rest of the burrito and seal the edge of the Nori with a little water. Unroll the sushi mat and carefully roll the burrito on top to even out the roll.
- Cut the burrito down the middle using a sharp and wet knife. In case you are cutting multiple burritos at the same time, ensure to clean and wet your knife after each burrito, as you might otherwise have sticky rice on the knife, which will make it difficult to cut the next one. If using parchment to hold your burrito together, wrap it around the roll before cutting.
- Sprinkle the halves with sesame seeds, if you like (I'm all over sesame seeds!) get your soy sauce dip ready and ENJOY!
Notes
- Nutritional information for reference only
Looking for more vegan recipes? Here are a few more that I'm sure you'll love:
- Vegan Egg McMuffin Recipe
- White Chocolate Biscoff Rocky Road Recipe
- Vegan Matcha Energy Balls Recipe
© 2025 Romy London / Romina Callwitz | All images, videos, wordings and content are copyright protected and belong to Romina Callwitz. Please do not use any of my content without prior permission. If you wish to re-publish any (part of my) content, please get in touch via email. Thanks for your support!
*Disclosure: This page may contain affiliate links and sponsored links that earn me a small commission, at no additional cost to you. You can find more information in my Privacy Policy.


💭 Leave a Comment