


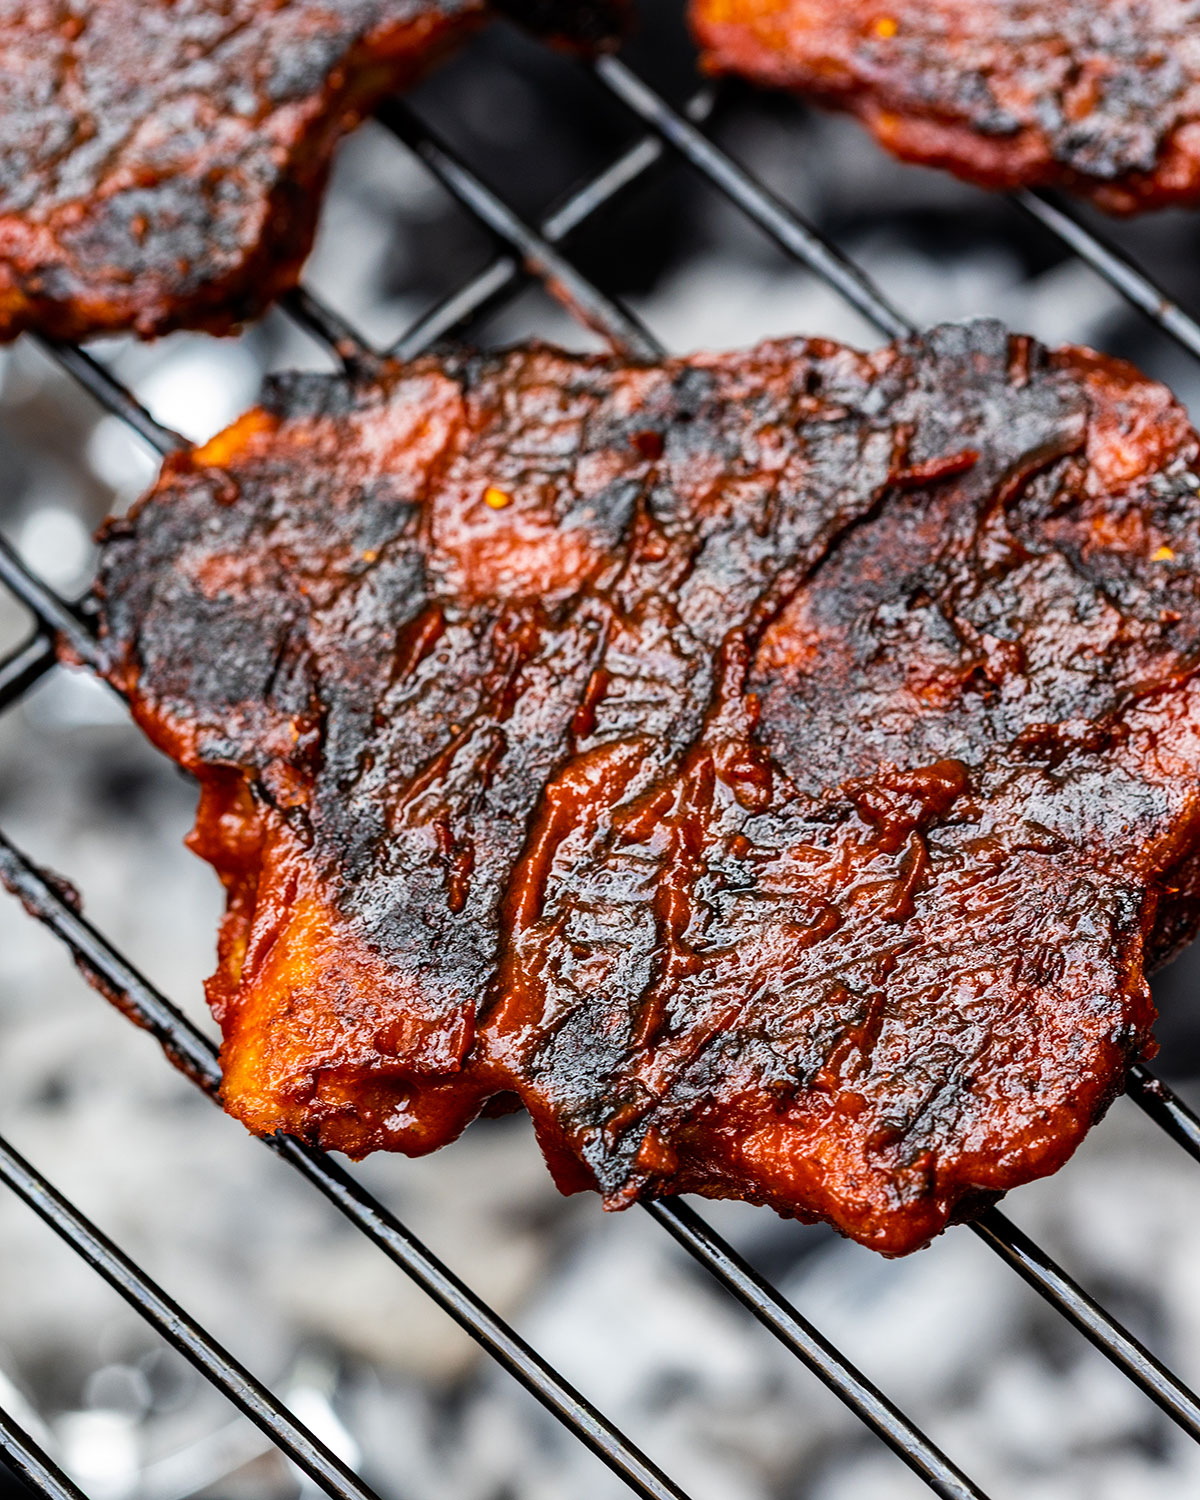
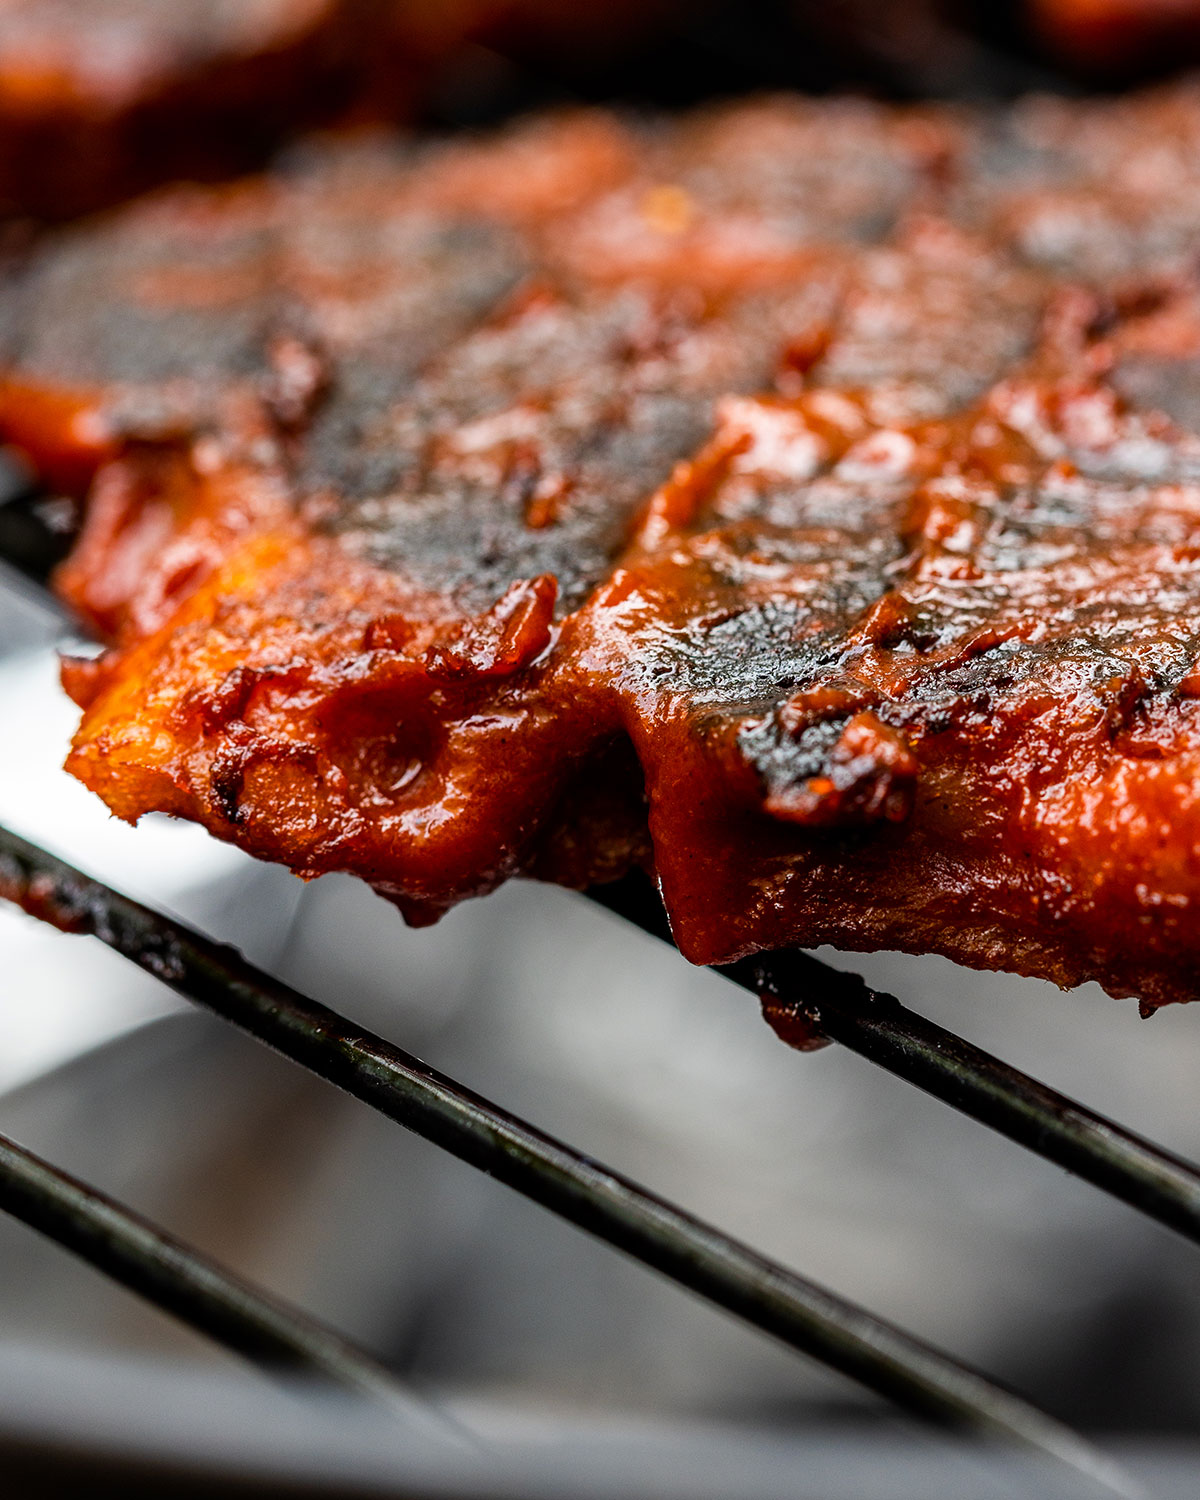
This vegan grilled chicken is made from washed-flour seitan, pan-seared until golden, coated in a smoky maple-tamari glaze, and finished on the barbecue.
Stretching and knotting the dough creates a layered, pull-apart texture inside, while the glaze becomes sticky and lightly caramelized around the edges.
Unlike seitan recipes made with vital wheat gluten, this one starts with strong white bread flour and water. The process takes a little time because the dough needs to soak, wash, drain, and rest, but each stage is straightforward - and I’ve included step-by-step photos so you can see exactly what the seitan should look like along the way.
No barbecue? You can finish the cutlets in a frying pan instead, so this recipe works just as well when the British weather inevitably changes its mind.
❤️ Why You’ll Love This Recipe
- Two cooking options: Finish it on the barbecue or cook it entirely in a frying pan.
- Firm, layered texture: Knotting the seitan creates strands that pull apart once cooked.
- Smoky barbecue flavor: The tomato, maple and smoked paprika glaze caramelises beautifully on the grill.
- Made from everyday flour: You do not need to buy vital wheat gluten.
Jump to:
🌱 Ingredients & Notes
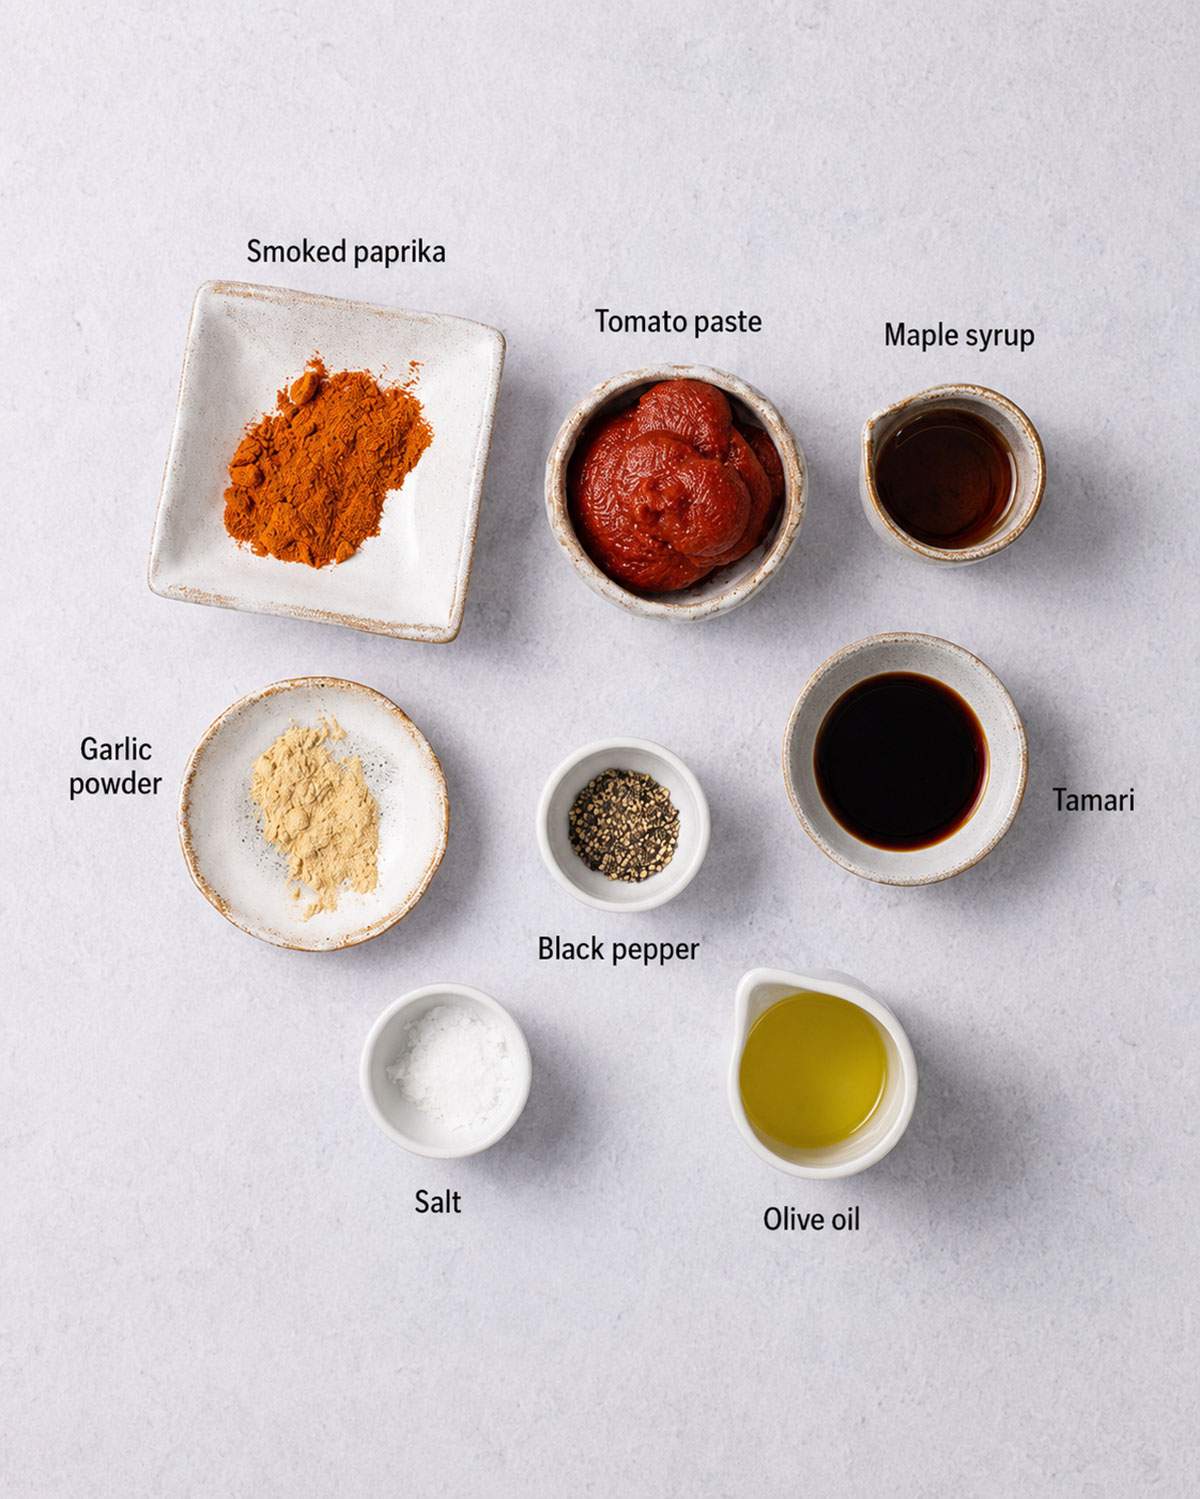
Here is everything you need for this recipe:
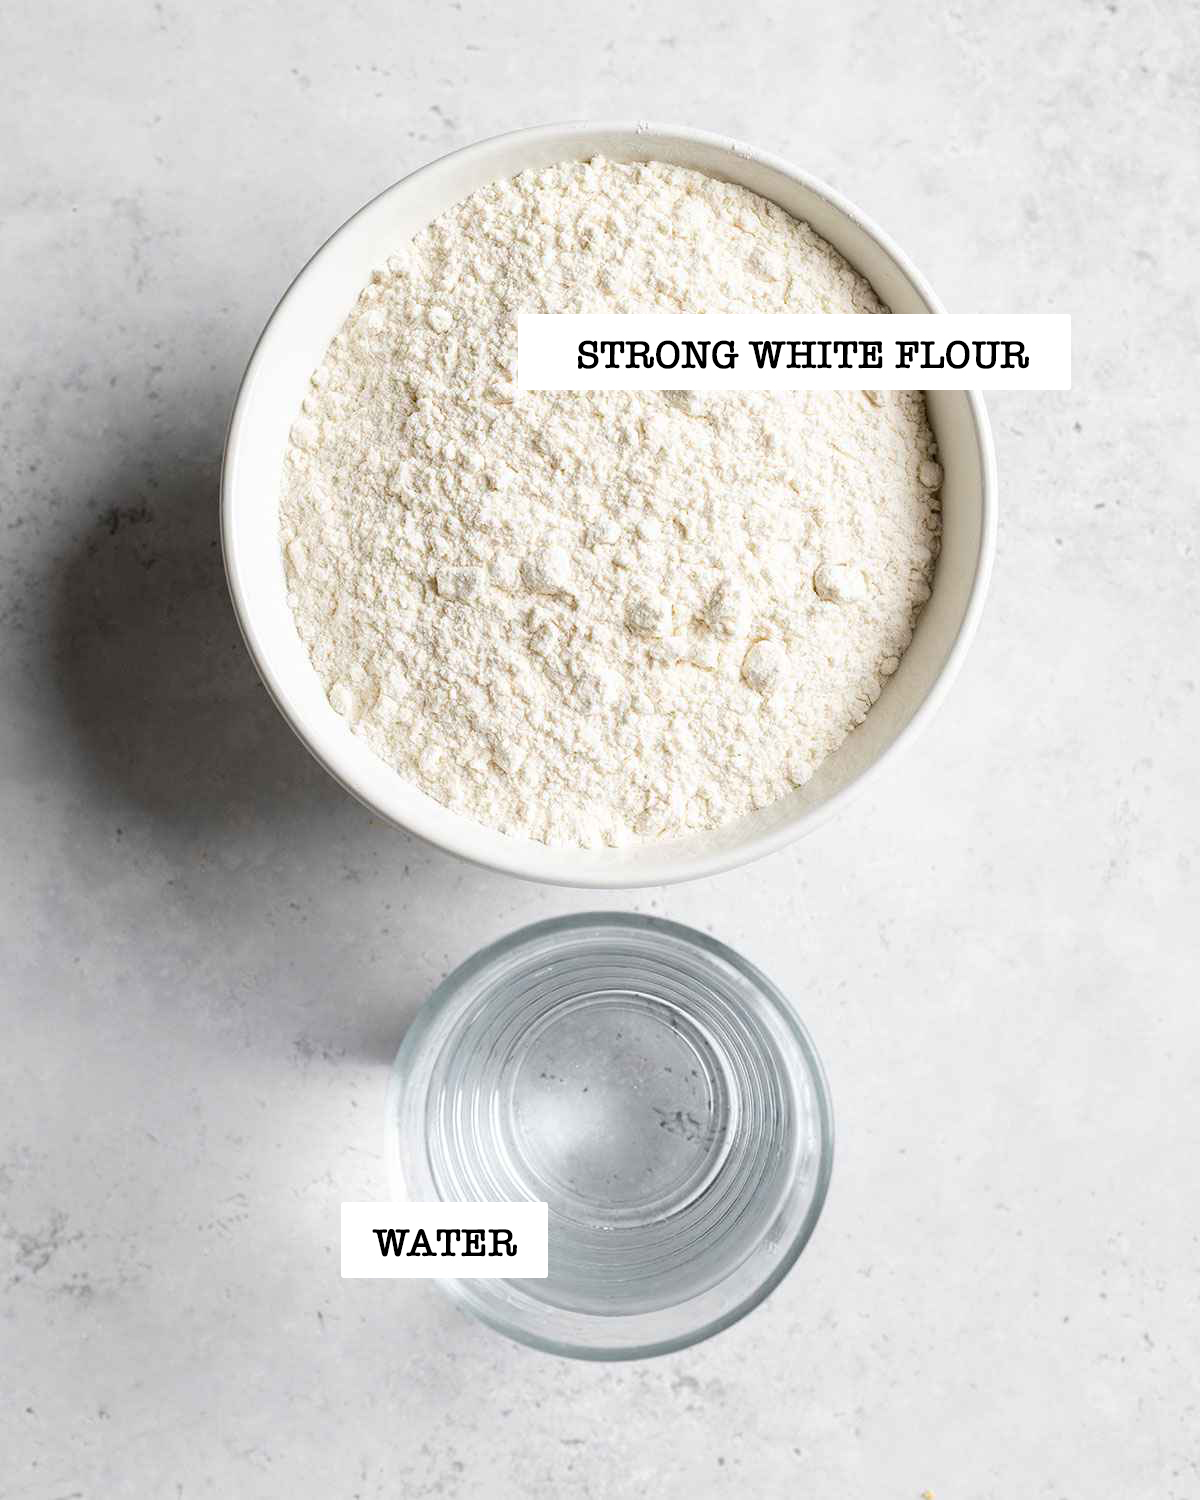
Strong white bread flour
Use a fine wheat flour containing at least 12g protein per 100g. The protein forms the gluten structure needed for the washed-flour method, so lower-protein plain flour may produce a smaller or softer piece of seitan.
Water
The exact amount can vary slightly depending on the flour. Add it gradually until you have a firm, smooth dough that is hydrated but not sticky.
Smoked paprika
Smoked paprika seasons both the seitan and the glaze. Use sweet smoked paprika for a smoky flavour without much heat.
Tamari
Tamari adds saltiness and savoury flavour to the glaze. Regular soy sauce also works unless you specifically need tamari.
Maple syrup
This balances the saltiness of the tamari and helps the glaze caramelise. Agave syrup can be used instead.
Scroll to the recipe card at the bottom of the post for detailed quantities and measurements.
🔪 Equipment
You'll need:
- 1 large mixing bowl
- colander
- food processor with dough hook (optional)
- non-stick frying pan/skillet
- barbecue or frying pan (see notes)
🧑🍳 How to Make Vegan Seitan Chicken From Flour (Step-by-Step)
Making seitan from flour involves washing the starch out of a simple flour-and-water dough, leaving the stretchy wheat gluten behind. This is often called the wash-the-flour method, or WTF method.
The dough can look loose, shaggy, and slightly alarming halfway through - but that is completely normal. Read through the steps before starting, and don’t skip the resting periods, as these help the gluten become firm and workable again.
Step 1: Make the Dough
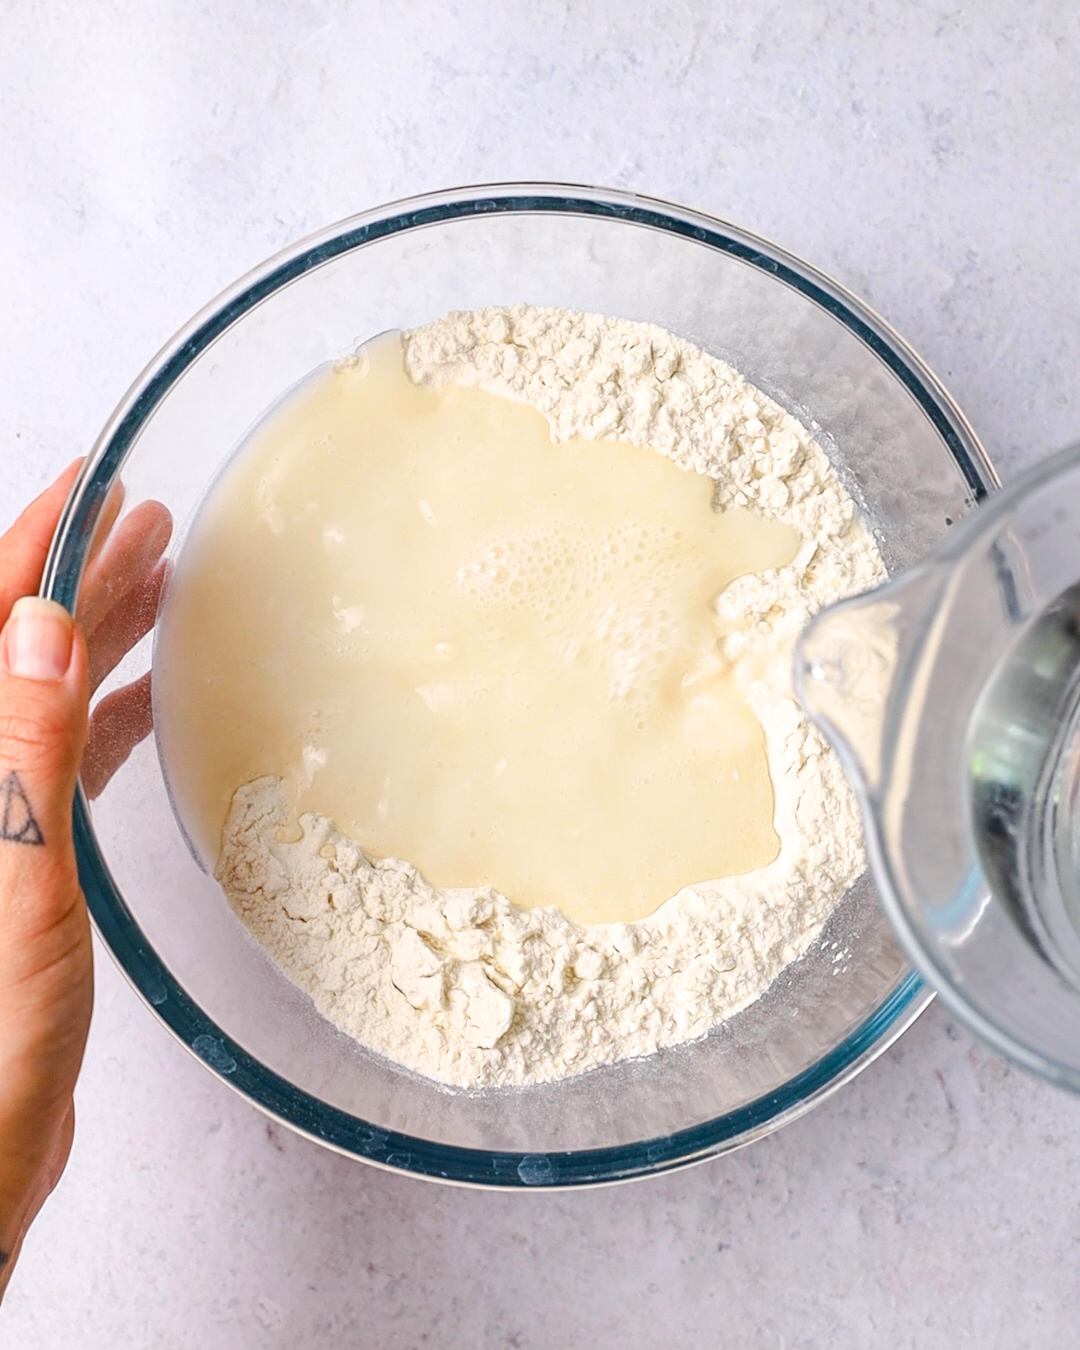
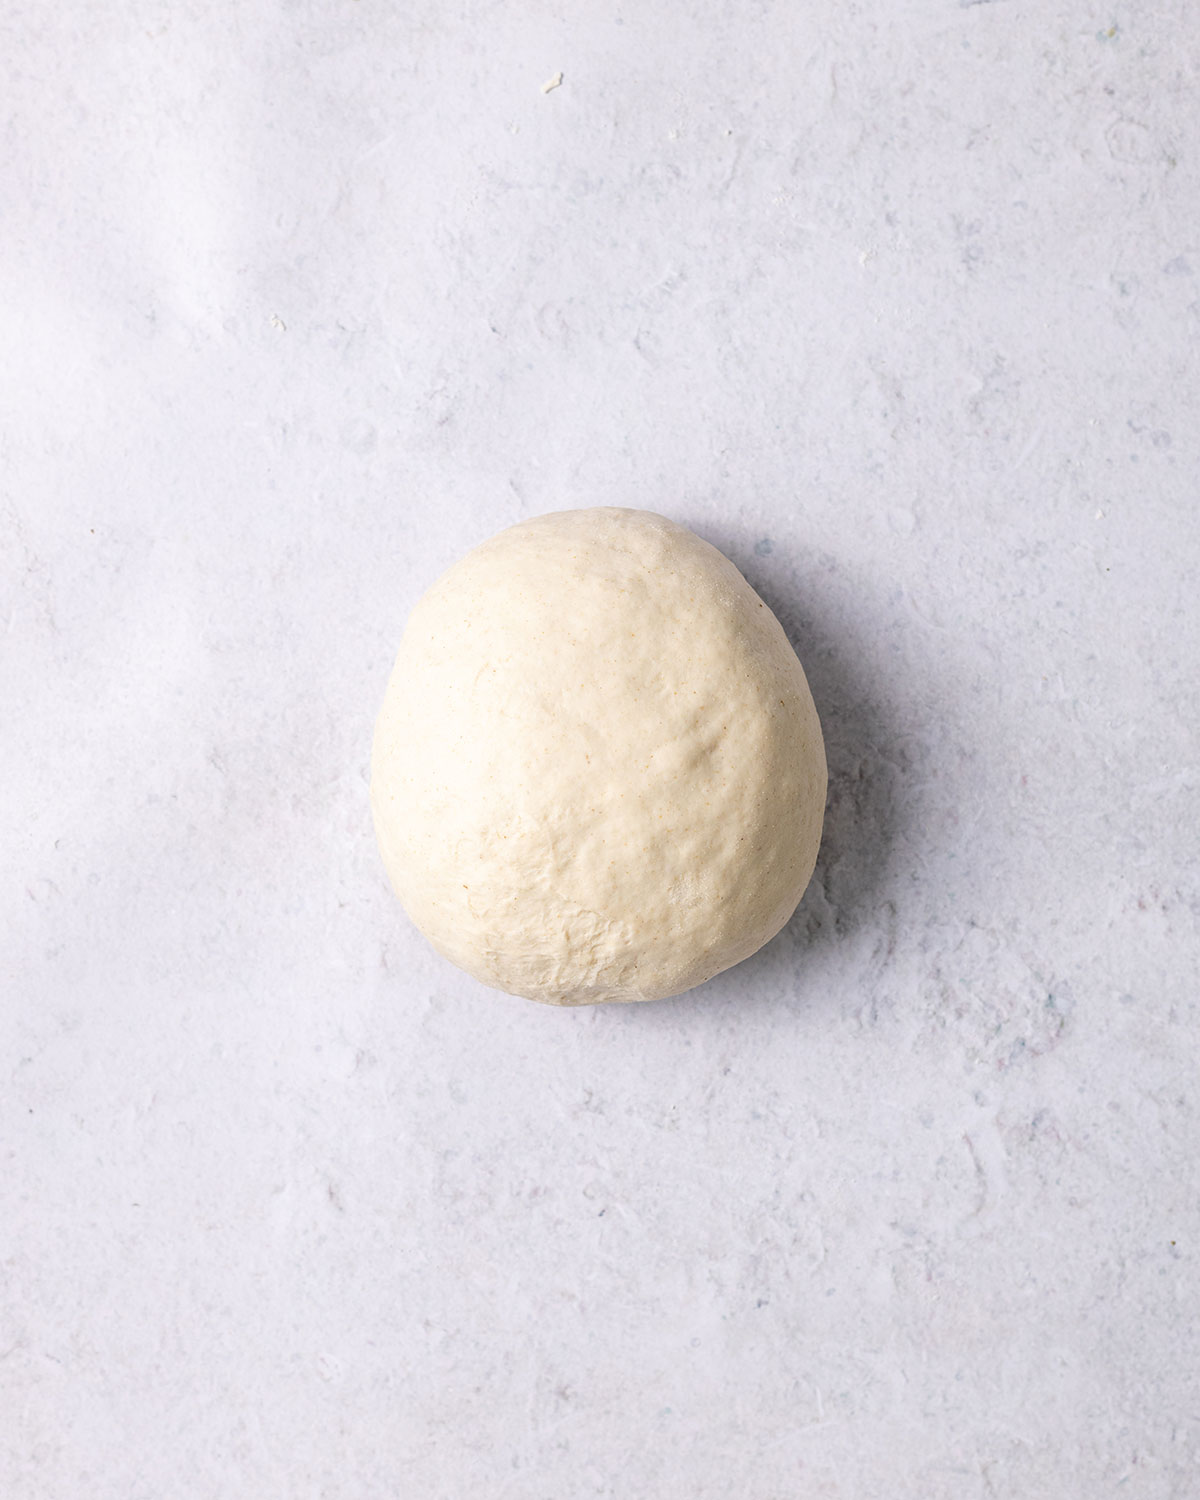
Place the strong white bread flour in a large mixing bowl. Add the water a little at a time, mixing until the flour comes together into a firm dough.
Knead the dough in the bowl or on a clean work surface for 2-3 minutes, until it feels smooth and no dry flour remains. It should be firm and hydrated but not wet or sticky.
Return the dough to the bowl and leave it to rest for 10 minutes.
Step 2: Soak the Dough
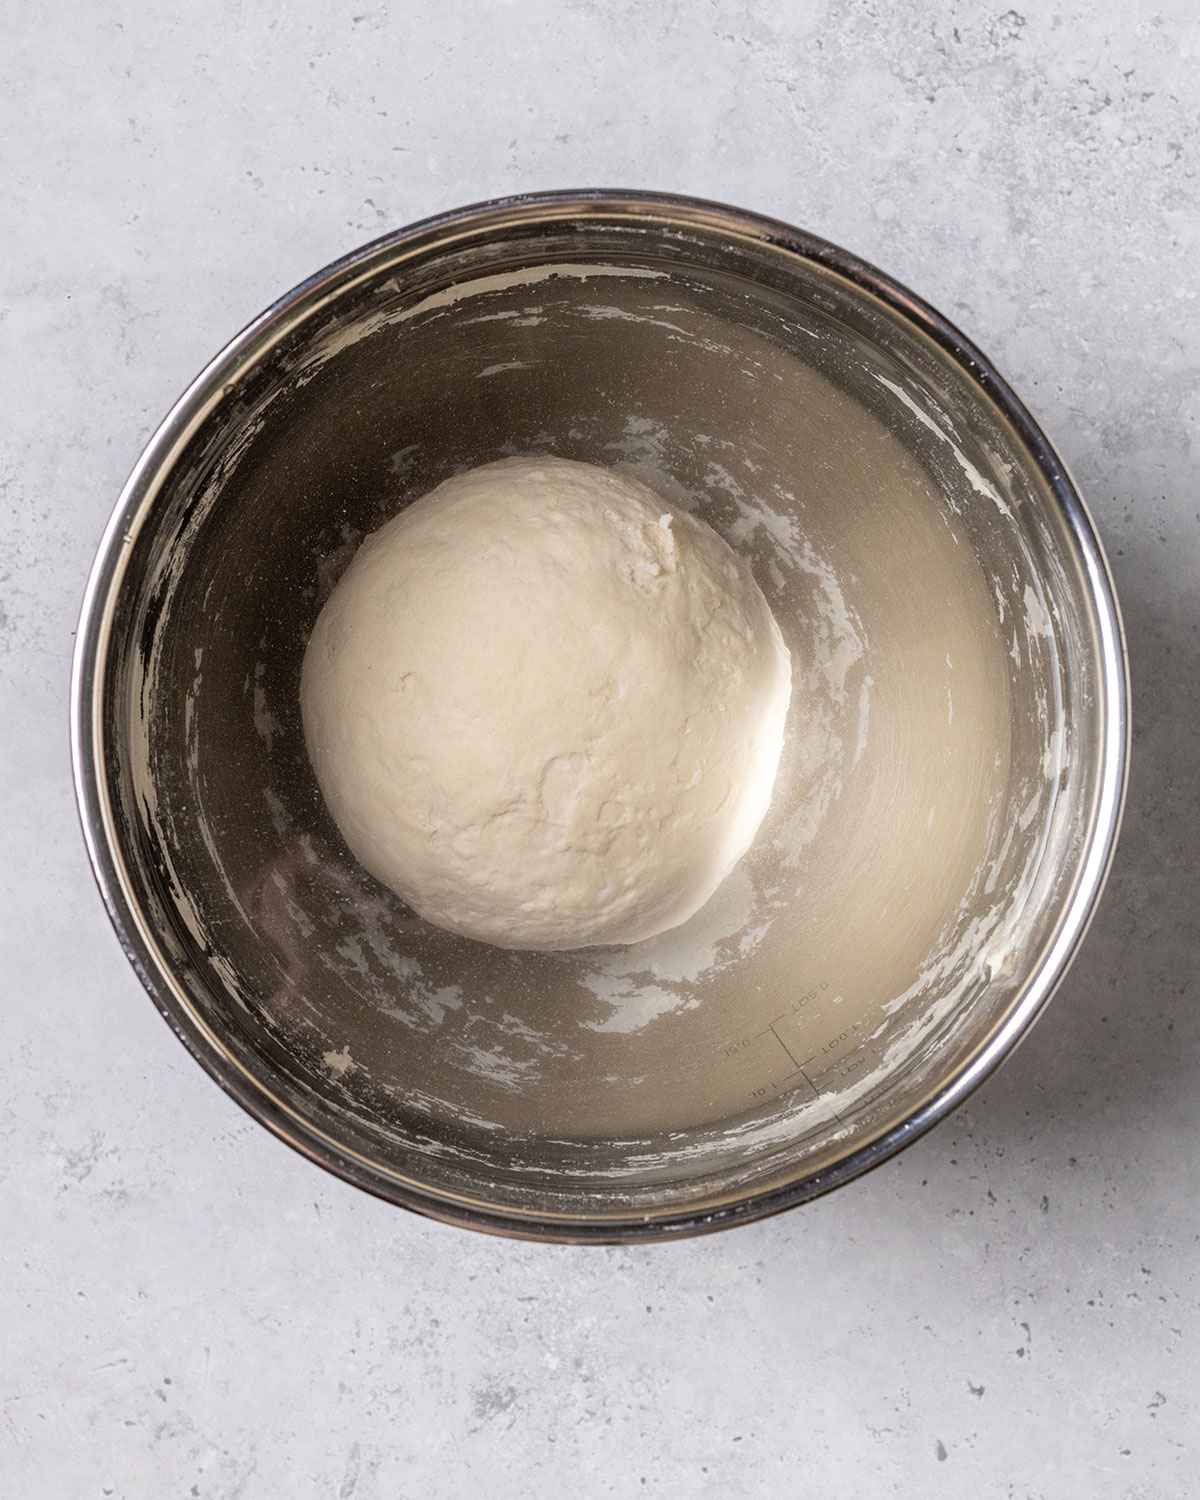
Cover the dough completely with cool water. It should be fully submerged, so add enough water to sit a few centimeters above it.
Leave the dough to soak for at least 30 minutes. During this time, it will soften and the starch will begin separating from the gluten, making the dough easier to wash.
Step 3: Wash Out the Starch
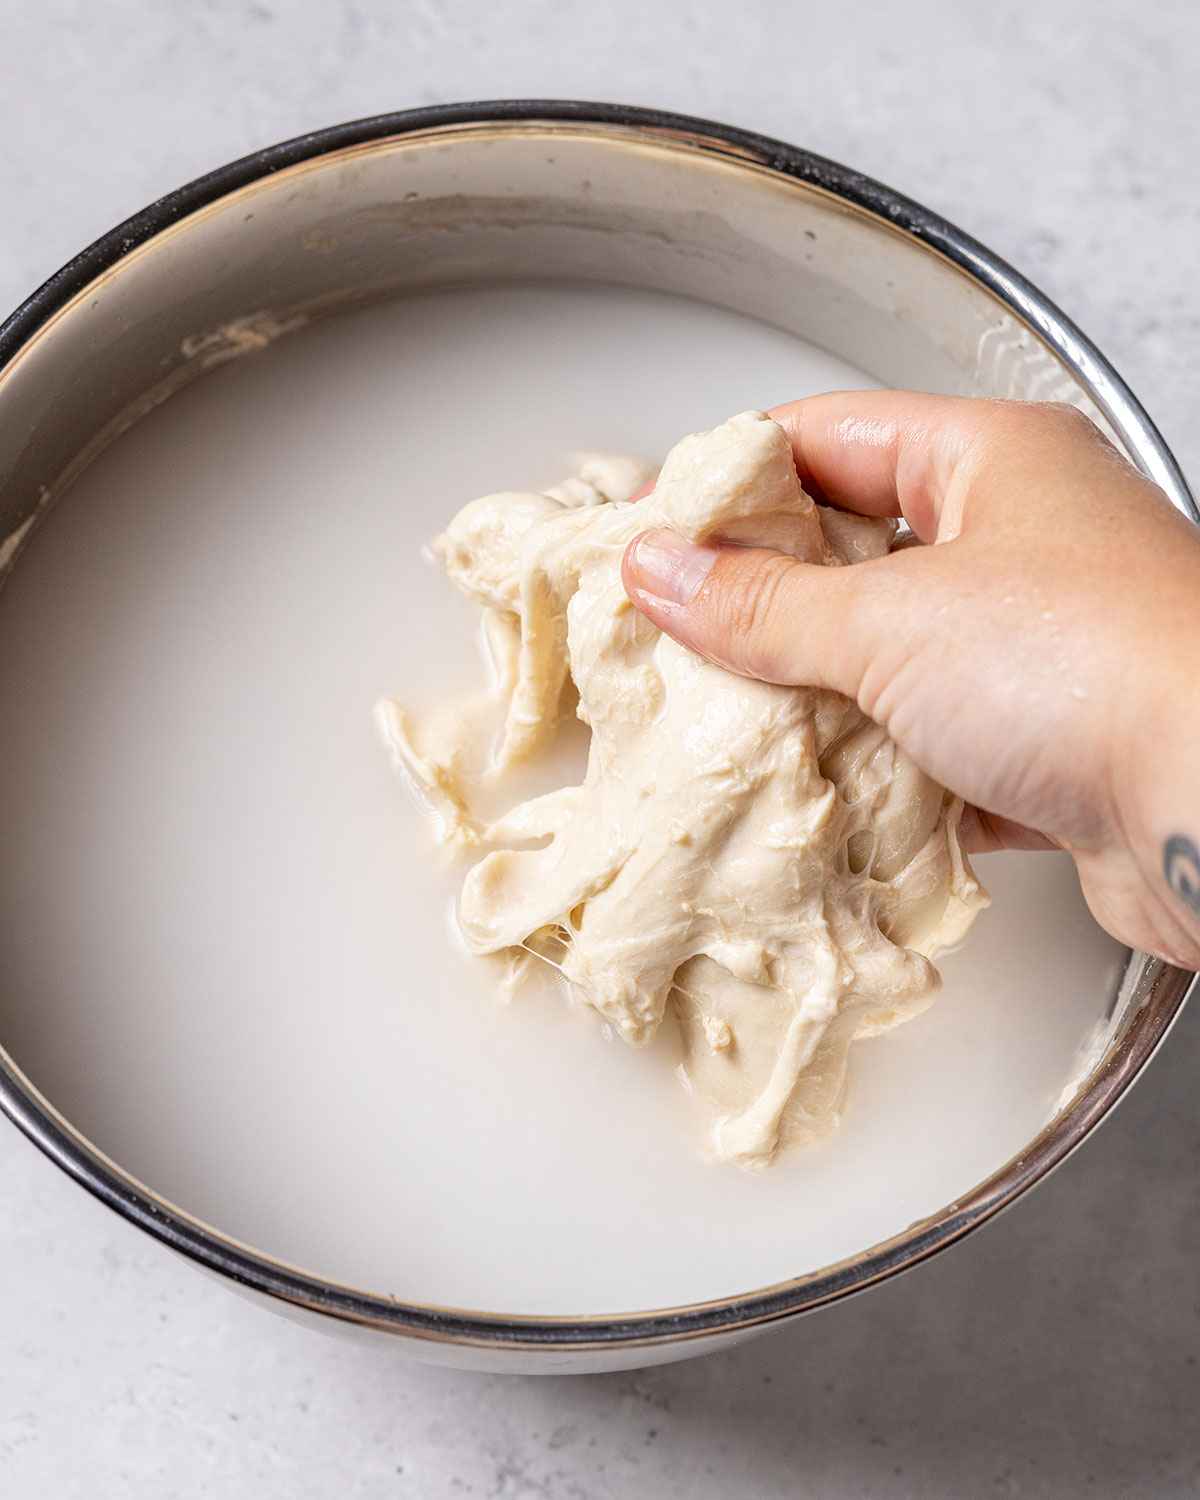
With the dough still submerged, begin gently squeezing, folding, and kneading it under the water. The water will quickly turn thick, white, and creamy as the starch is released.
After 2-3 minutes, carefully drain away the starchy water and refill the bowl with fresh water. Continue washing the dough in the same way.
Repeat this process approximately three times, or until the water remains pale and translucent rather than becoming thick and milky. It does not need to run completely clear - a small amount of starch helps the finished seitan retain a softer texture.
The dough may become very loose, stringy, or appear to fall apart while you wash it. This is normal. Keep gathering the pieces together and handle them gently; the gluten will become more cohesive during the next resting stage.
Step 4: Drain and Rest the Gluten
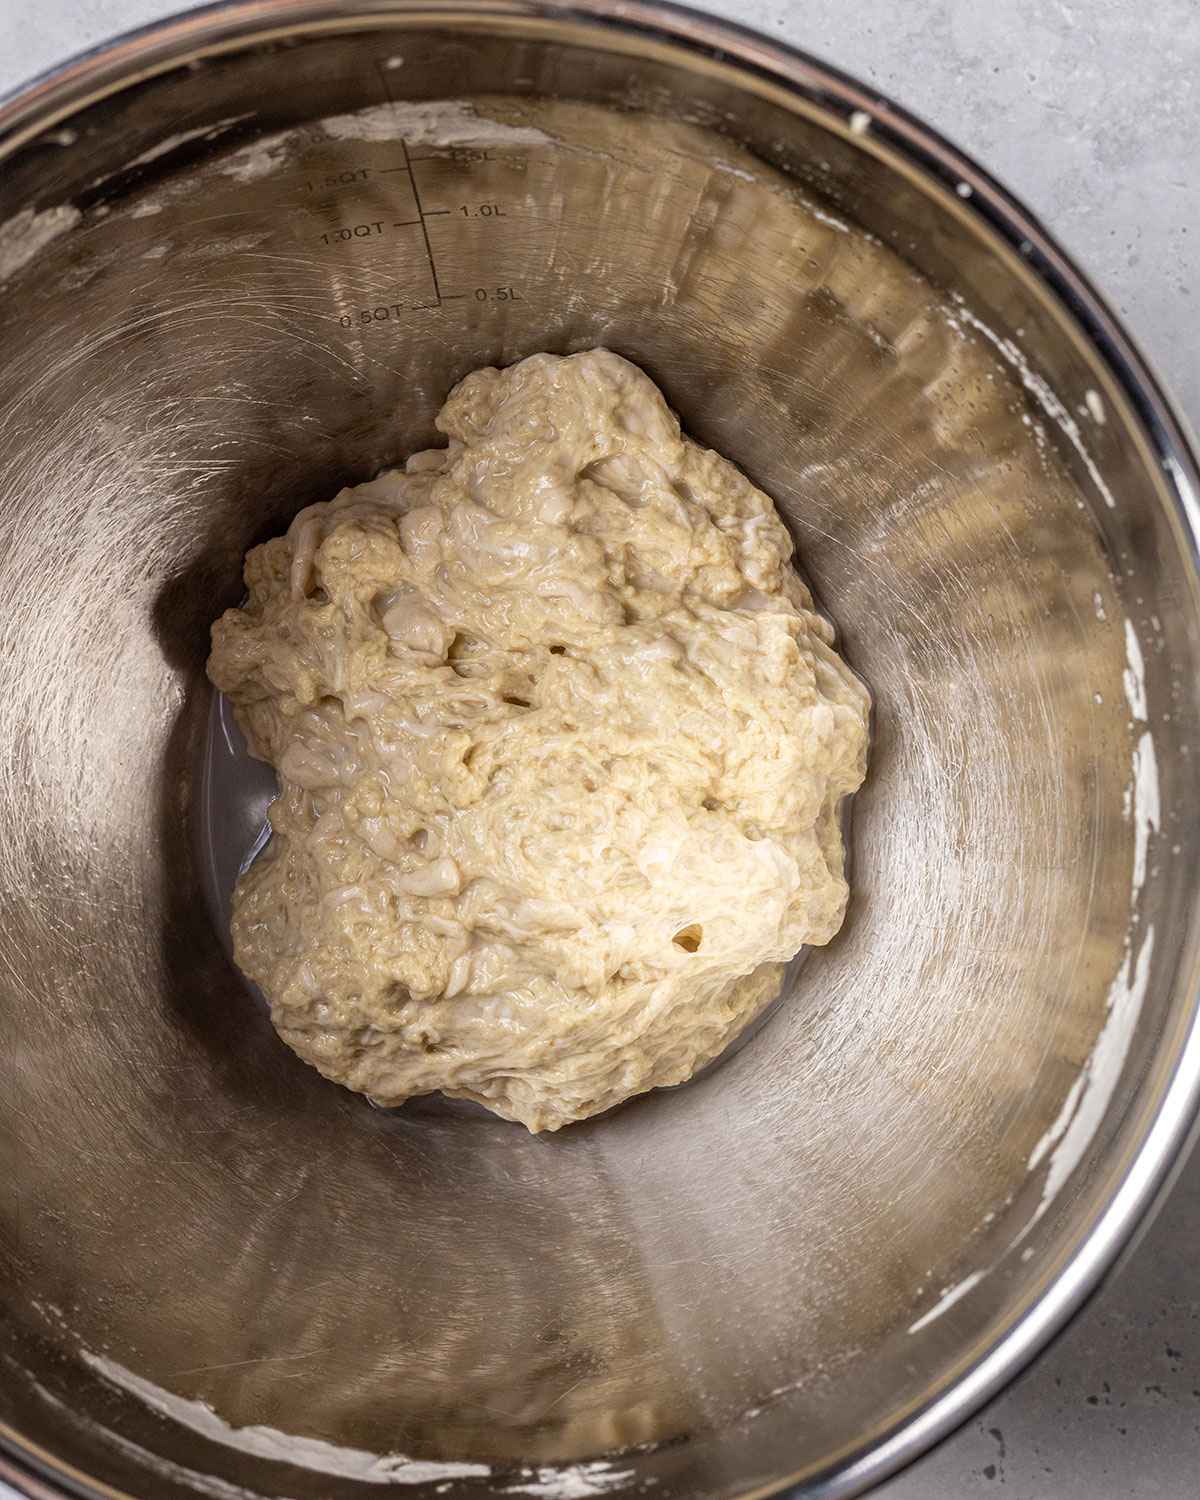
Transfer the washed dough to a colander and briefly rinse it under cool running water.
Leave it to drain and rest in the colander for approximately 30 minutes. Make sure excess water can drain away rather than collecting beneath it.
During this rest, the gluten strands will reconnect and the dough should become noticeably firmer, smoother, and easier to stretch.
Step 5: Season the Seitan
Sprinkle the smoked paprika and salt over the drained seitan.
To distribute the seasoning evenly, place the seitan in a food processor fitted with a dough attachment and pulse for 10-20 seconds. Avoid blending it continuously - you only want to work in the seasoning, not turn the dough into a paste.
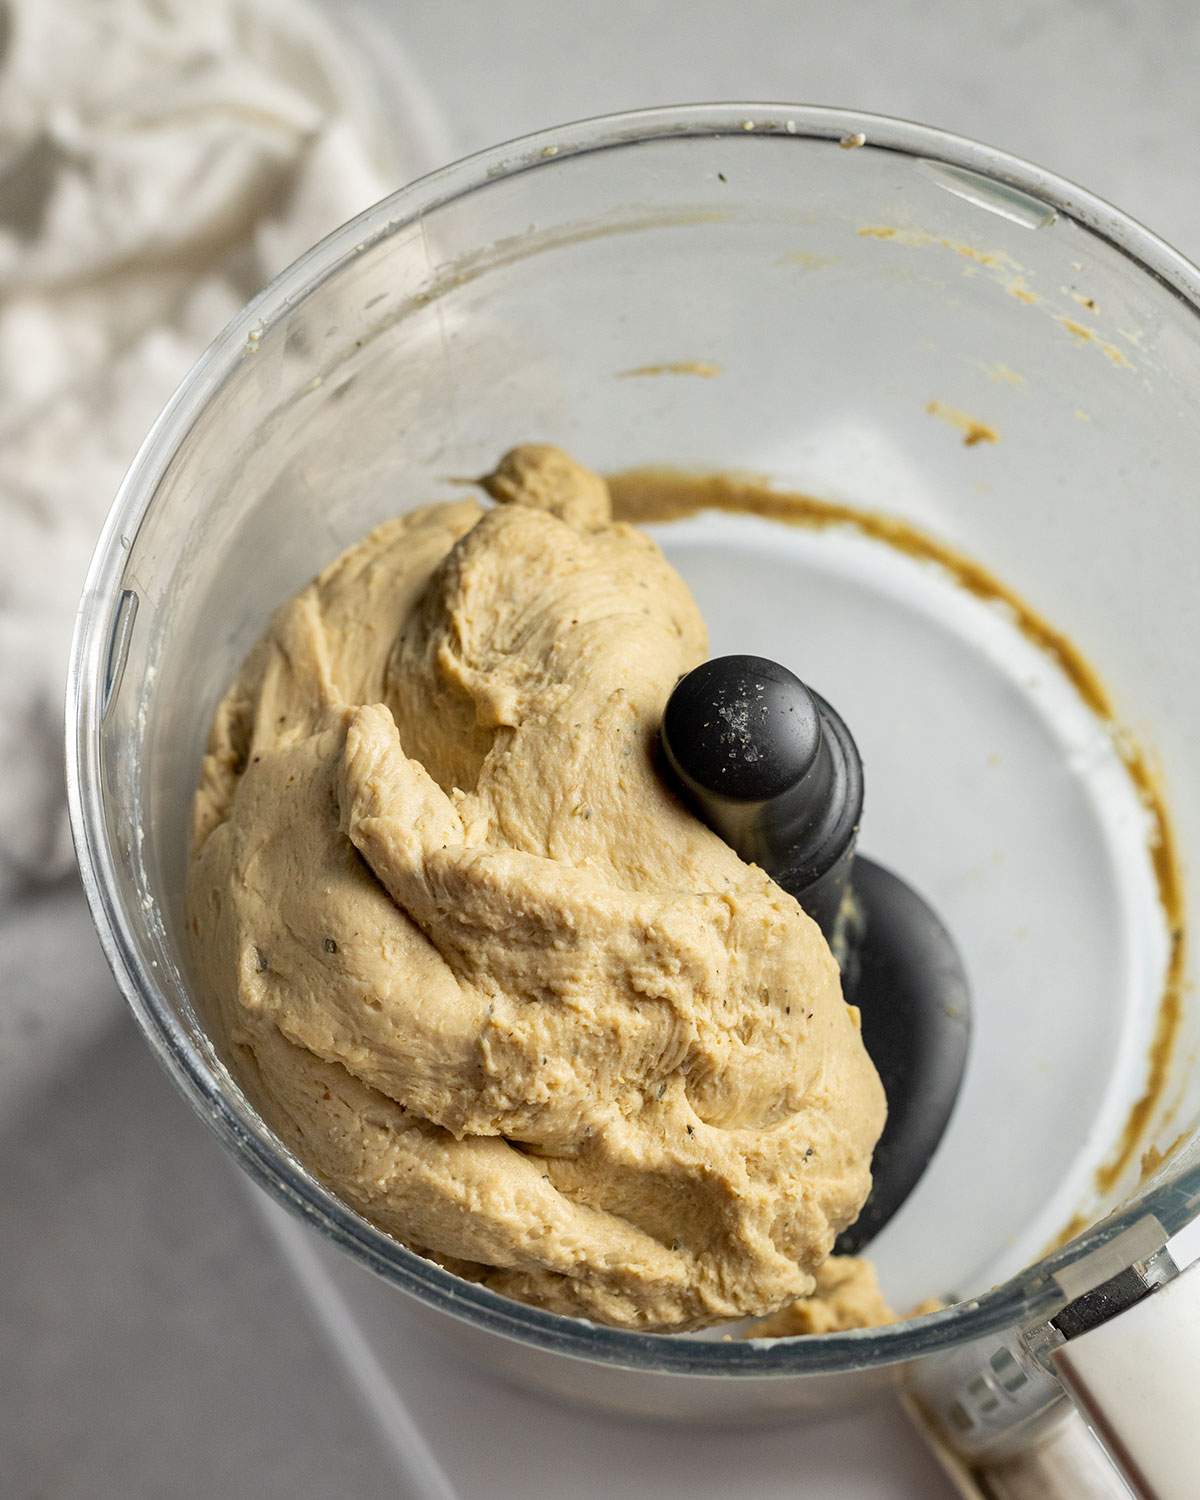
Alternatively, sprinkle the seasoning over the seitan and knead it in gently by hand.
If you use a food processor, let the seasoned dough rest for another 10-15 minutes so the gluten strands can settle and reconnect.
Step 6: Stretch and Knot the Dough
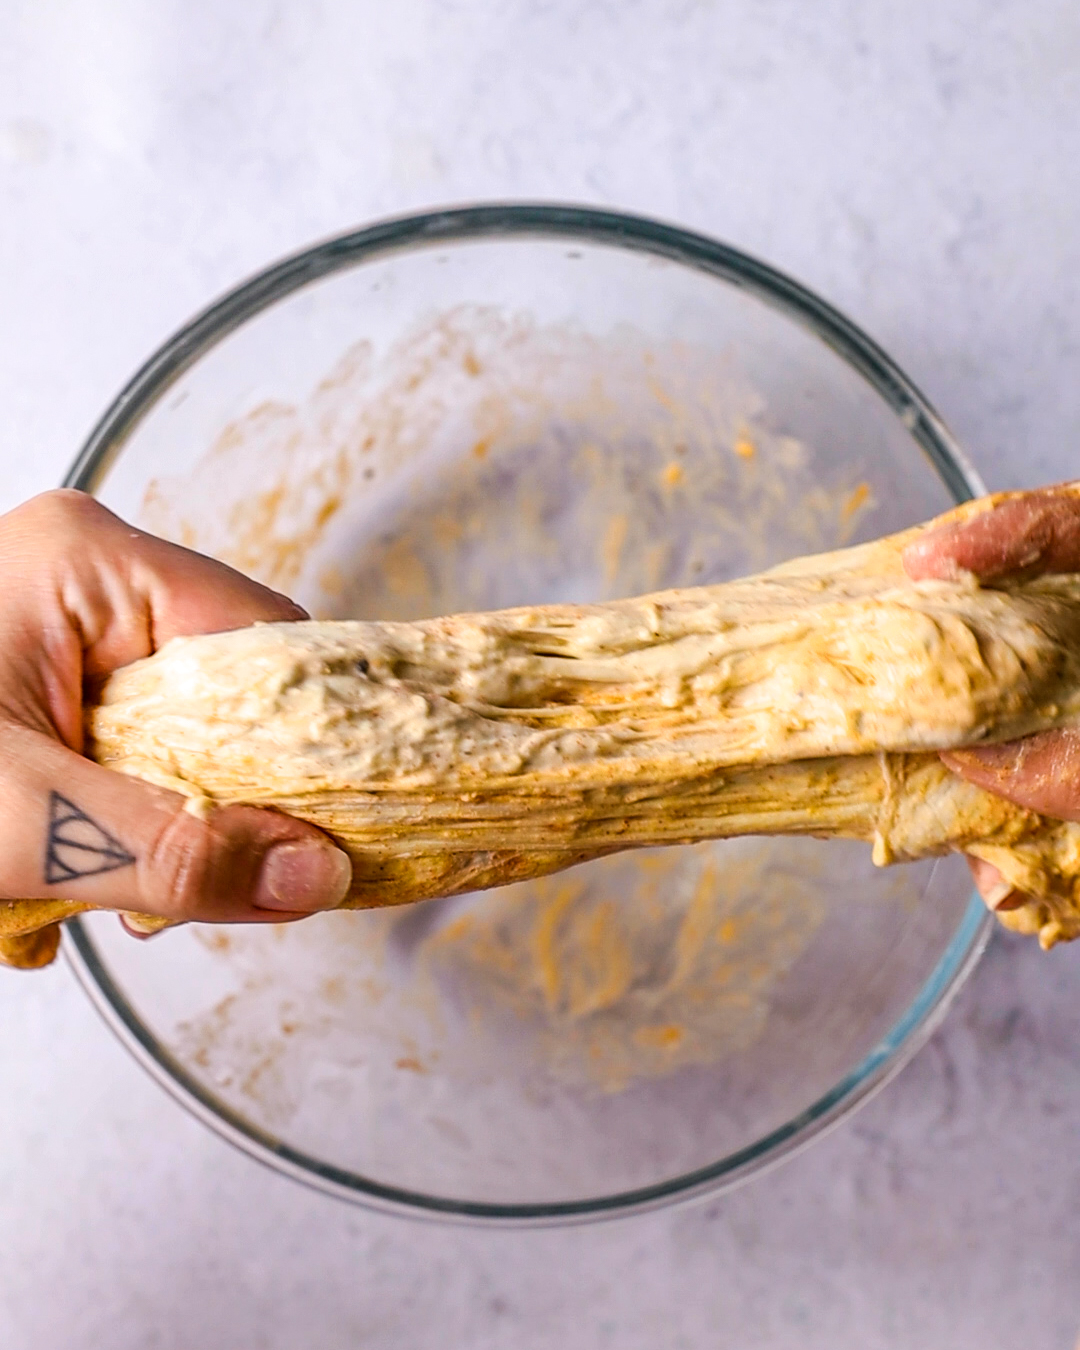
Gently stretch the seitan into a long, thick strip, stopping before it begins to tear. Tie it into a loose knot, then pull and stretch the remaining ends before knotting them again.
Repeat this approximately 5-6 times. The knots do not need to look neat - the purpose of this step is to create overlapping gluten strands, which give the cooked seitan its layered, pull-apart texture.
If the dough keeps tearing or is difficult to knot, let it rest for another 10 minutes before trying again. You can also skip the repeated knotting if necessary; the seitan will still work, although its texture may be slightly less fibrous.
Step 7: Shape the Cutlets
Divide the knotted seitan into 2-3 pieces. Gently press each piece between your hands to form a roughly even cutlet.
Try to keep the cutlets a similar thickness so they cook at the same rate. They do not need to look perfectly uniform - an uneven, rustic shape works well for this recipe.
Step 8: Pan-Sear the Seitan
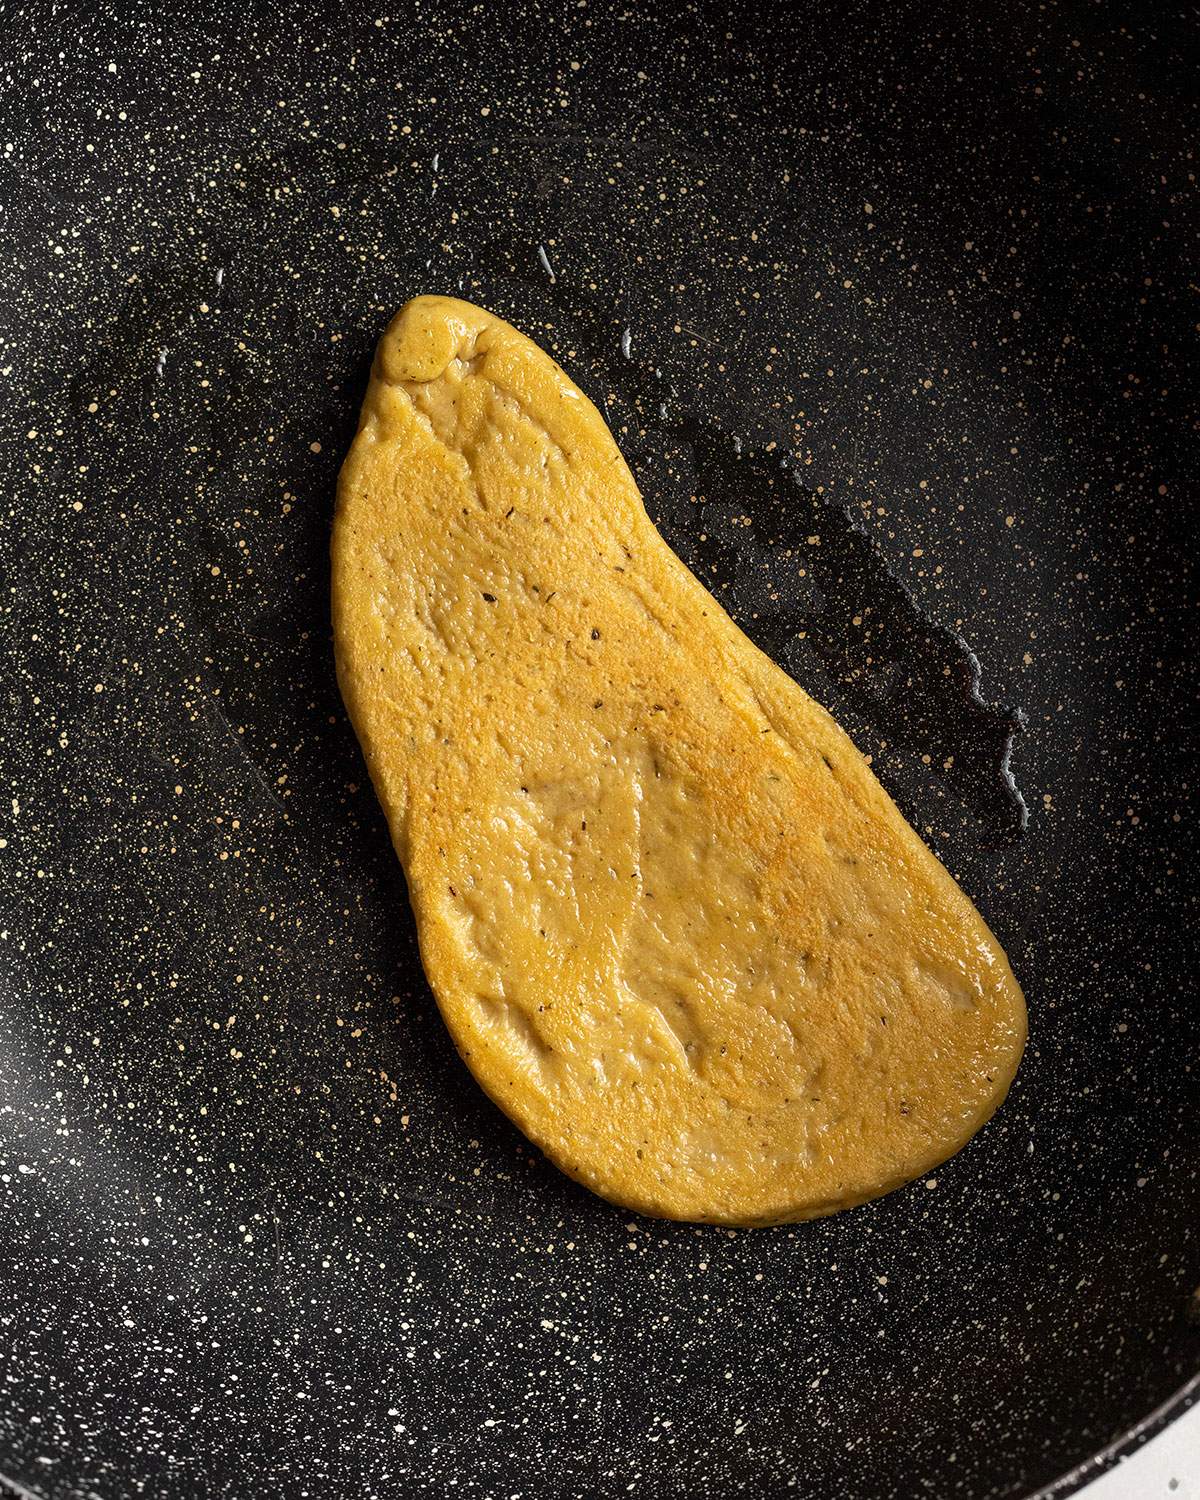
Heat 1-2 tablespoons of oil in a large nonstick frying pan over medium-high heat.
Add the seitan cutlets and gently press them against the hot pan. Cook for 2-3 minutes on each side, or until they develop a lightly golden, crisp surface.
Remove the cutlets from the pan. They are now ready to be coated in the smoky glaze and finished on the barbecue.
Step 9: Prepare the Smoky Glaze
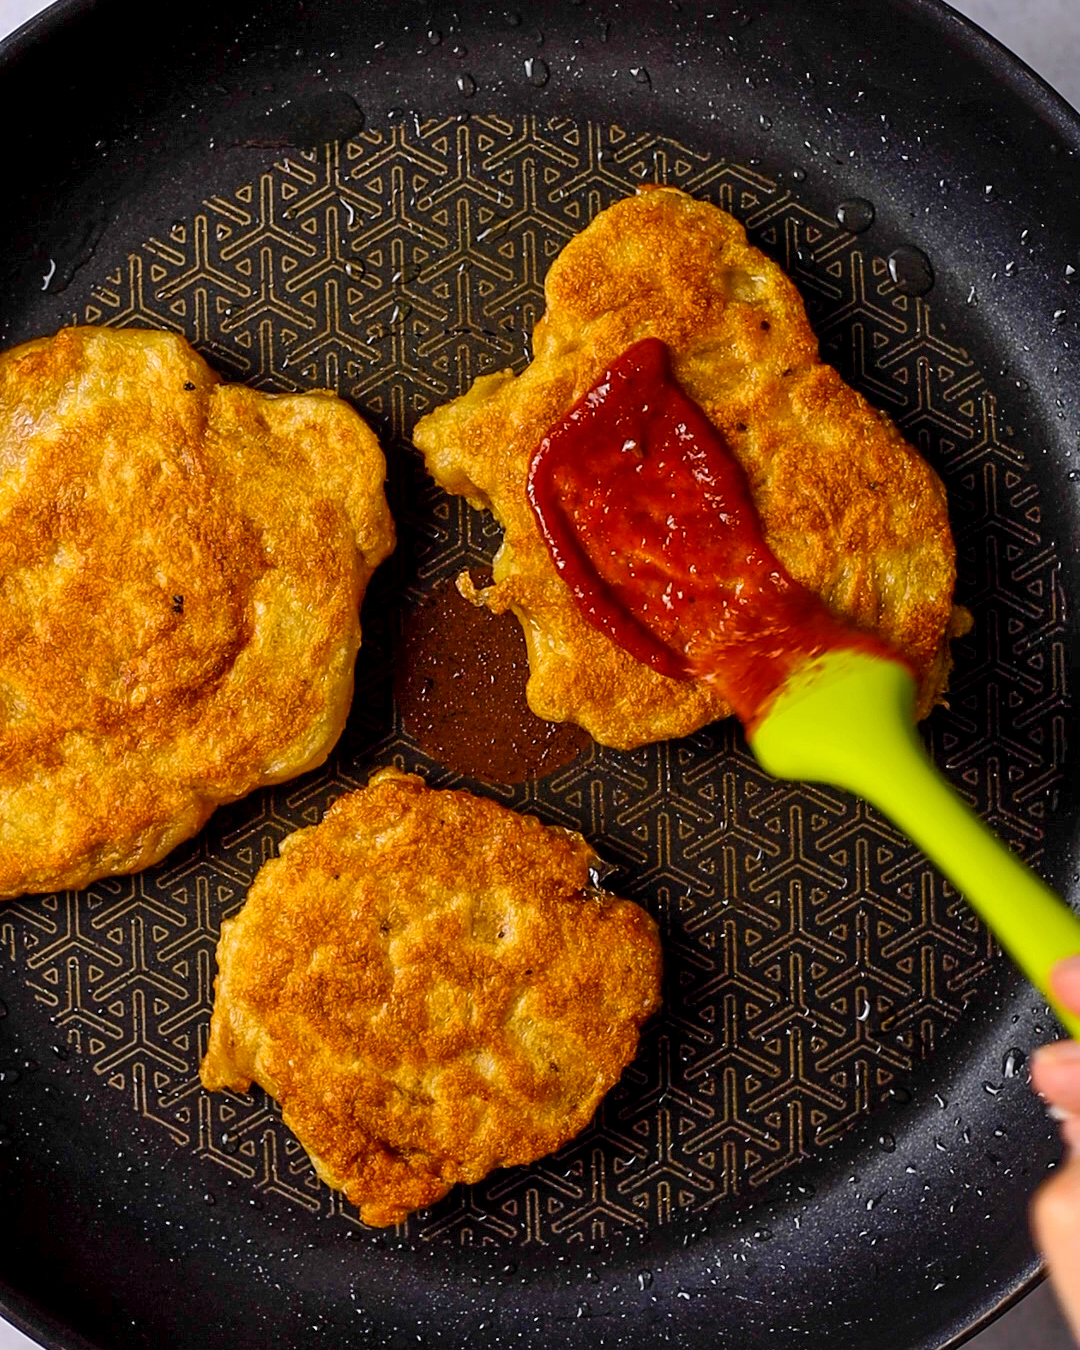
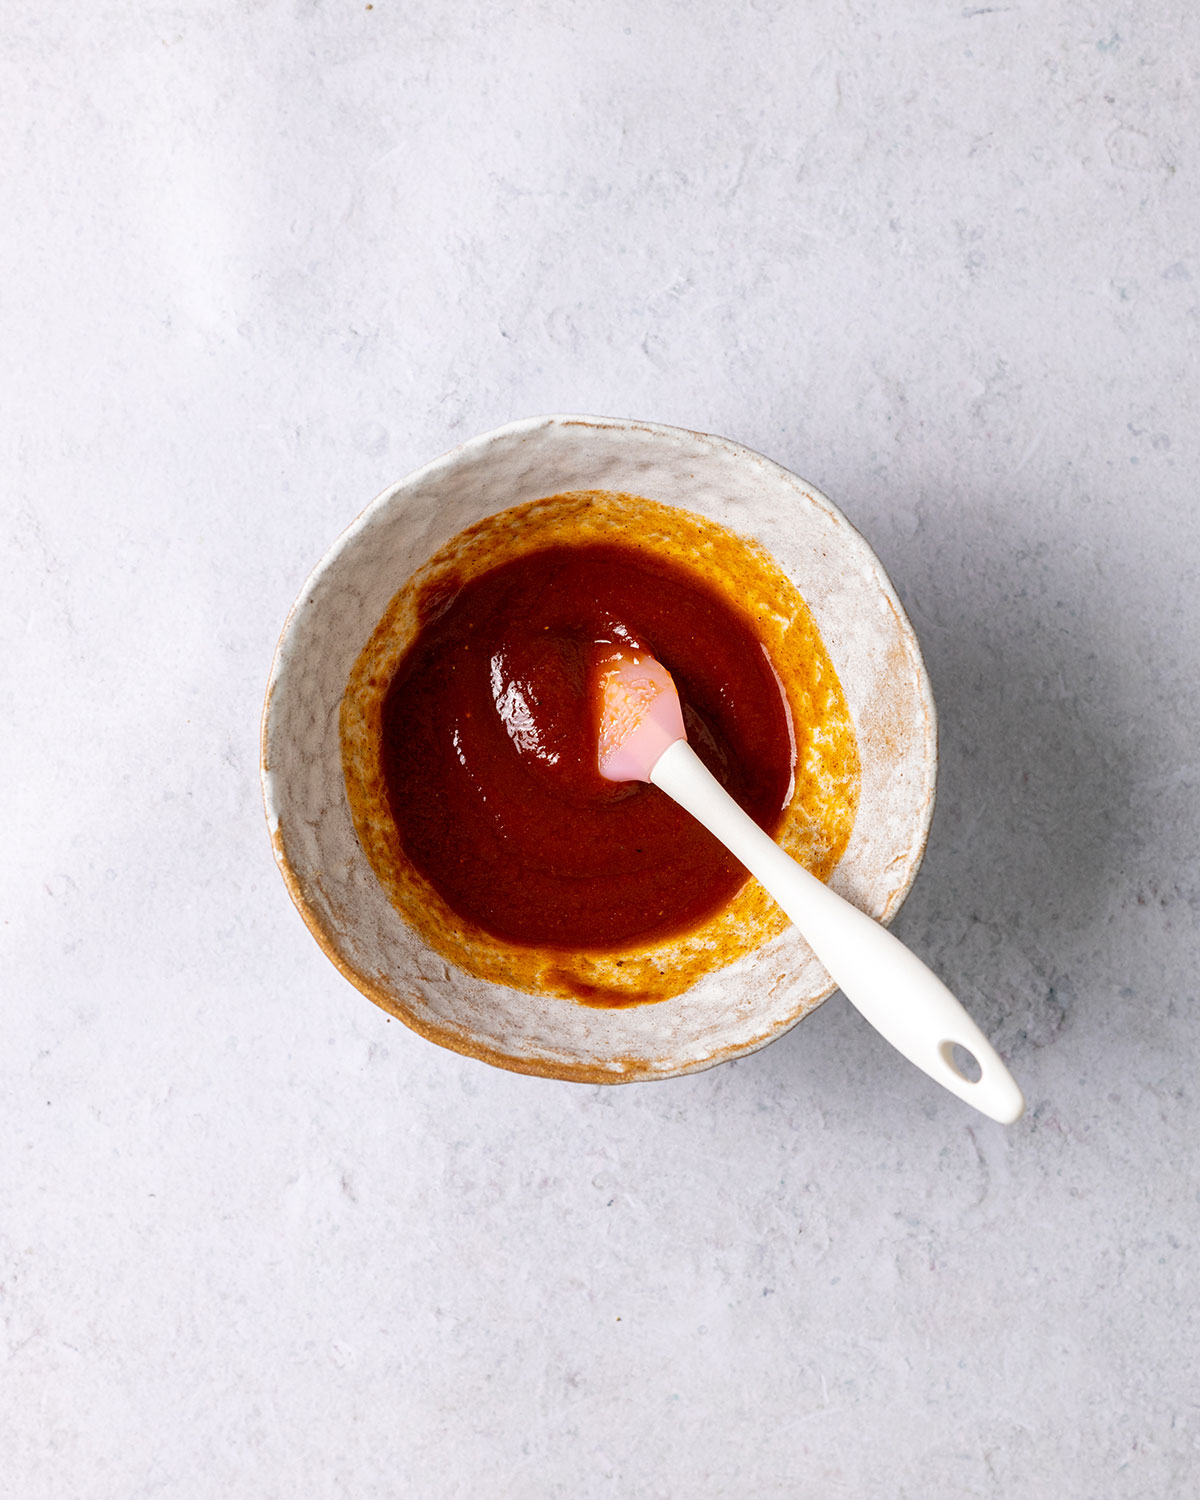
While the seitan is cooking, combine the tomato paste, tamari, maple syrup, olive oil, smoked paprika, salt, and black pepper in a small bowl.
Stir until smooth, then brush the glaze generously over both sides of the pan-seared cutlets before placing them on the barbecue.
🔥 How to Grill Seitan Chicken
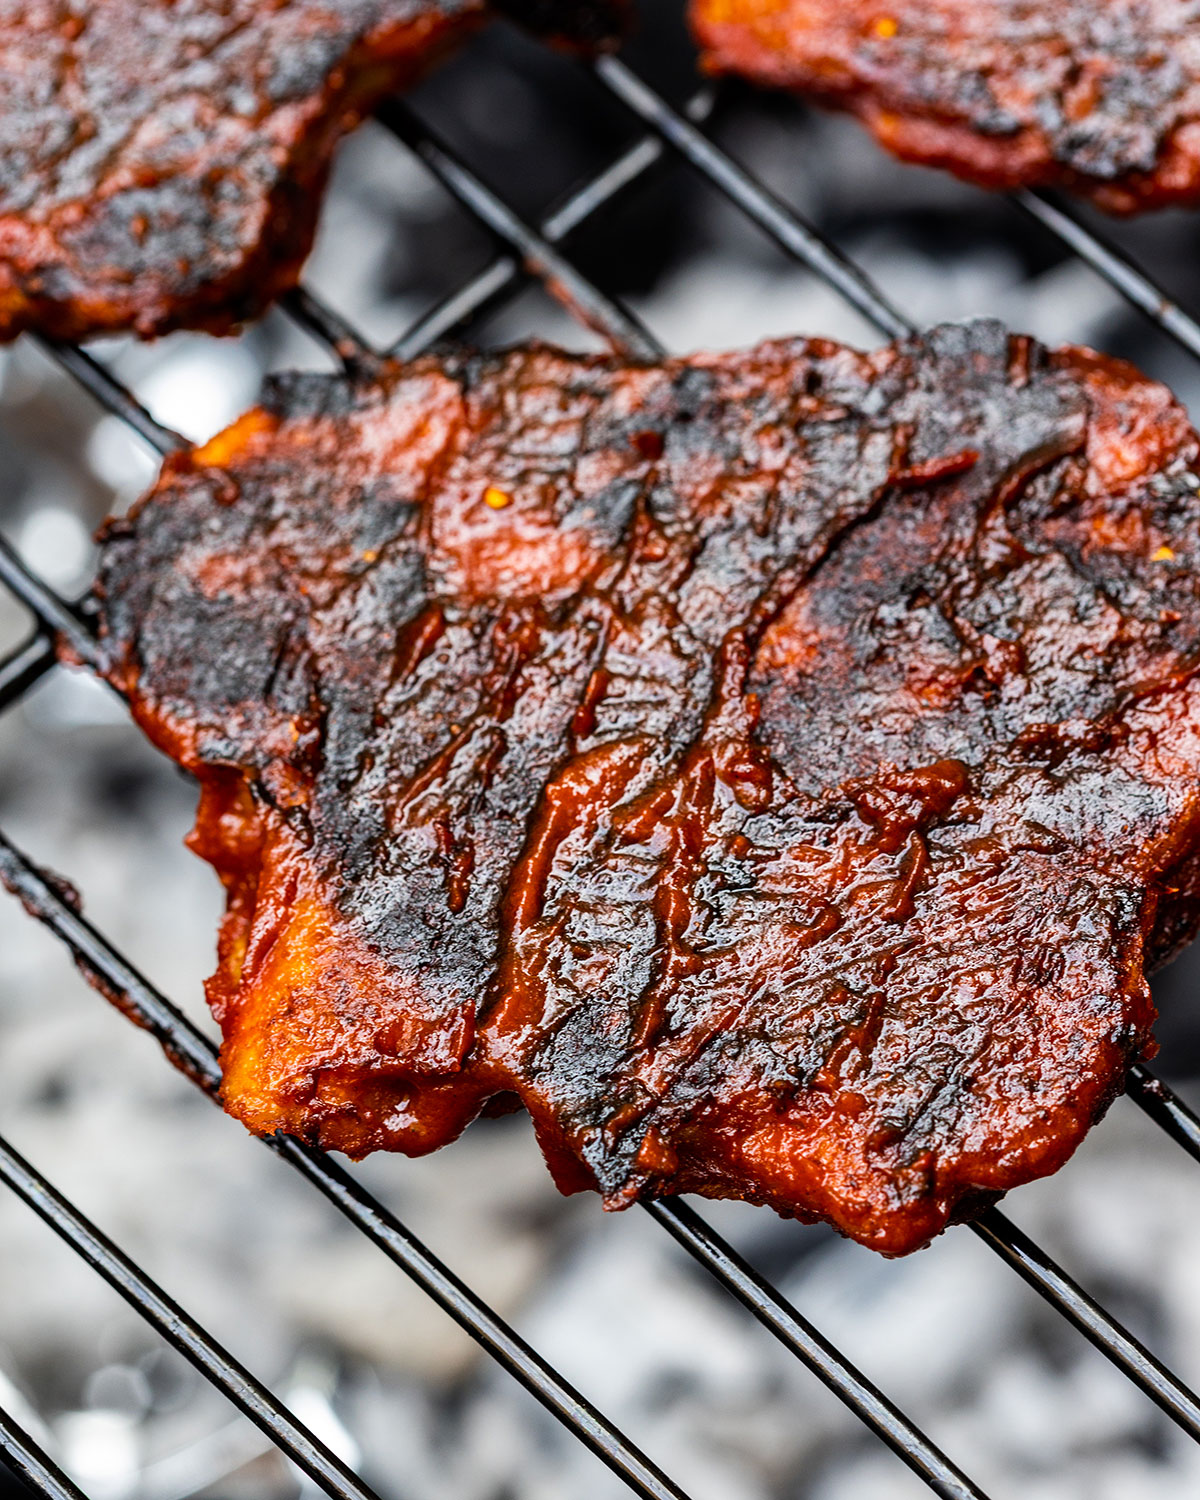
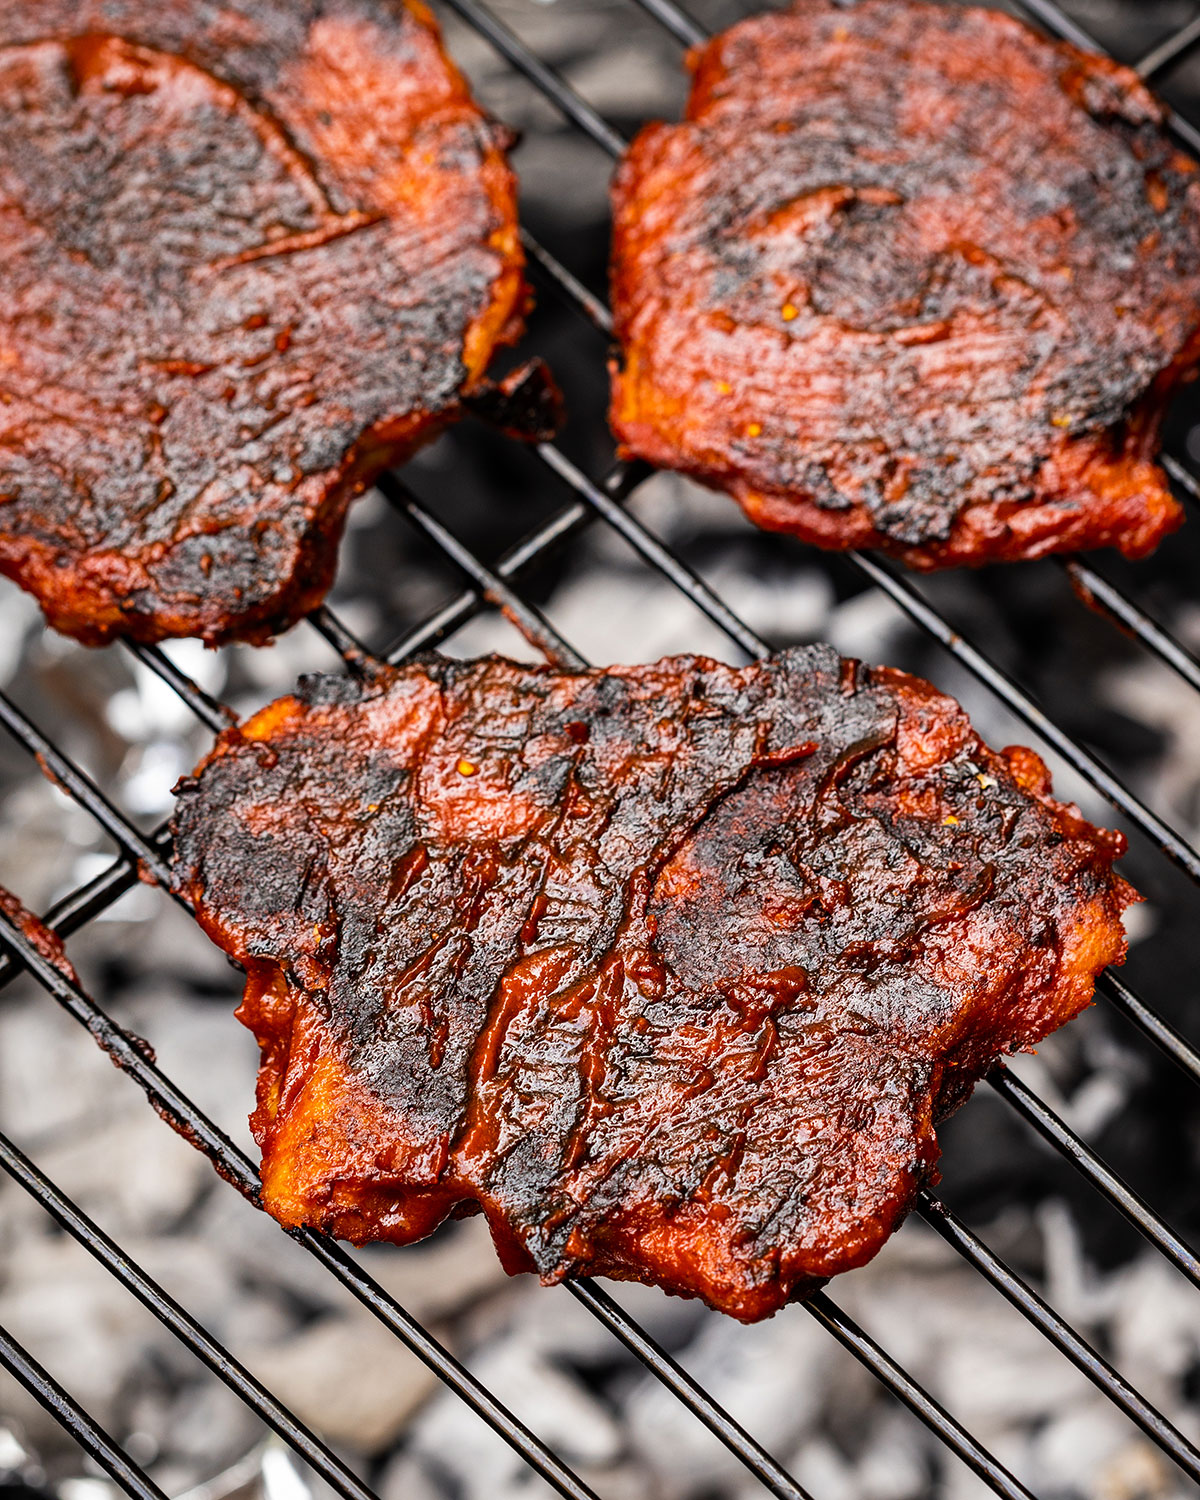
To grill this seitan BBQ chicken, first, make sure that your charcoal BBQ is hot and ready. It should be at 150C-170C for the perfect temperature.
Place the sauce-coated straight onto the grid over the hot coals and grill them on each side for roughly 4-5 minutes or until golden and lightly crispy.
📌 If you love Pinterest you can pin any of the images to your boards!
💡 Washed-Flour Seitan Troubleshooting
My dough is falling apart while I wash it
This is normal, particularly during the first few washes. Handle it gently, keep gathering the loose pieces together and avoid tearing it into tiny fragments. The gluten will become more cohesive after it drains and rests.
How clear should the washing water become?
It does not need to run completely clear. Stop once the water is thin and translucent rather than thick and milky. Leaving a small amount of starch behind can help prevent the finished seitan from becoming excessively firm.
My washed dough is very soft
Let it drain thoroughly in a colander and give it the full resting time before seasoning it. This allows the gluten strands to reconnect and makes the dough much easier to stretch and knot.
Why did my seitan turn out tough?
Tough seitan can be caused by overworking the dough, washing away too much starch or cooking it too aggressively. Stretch and knot it only until it holds together, and use the tested barbecue temperature rather than placing it over excessively fierce heat.
🍳 How to Cook It Without a Barbecue
After the initial sear, brush both sides of the seitan cutlets with the glaze. Return them to a lightly oiled frying pan over medium heat and cook for 3-4 minutes per side.
Add another thin layer of glaze as they cook, allowing it to become sticky and caramelised around the edges. Reduce the heat if the maple syrup begins to darken too quickly.
🍽️ How To Serve
Serve these seitan cutlets straight from the barbecue with potato salad, grilled vegetables, corn on the cob or a crisp green salad.
They also work well sliced and added to a vegan Caesar salad, tucked into a toasted bun with lettuce and smoky sauce, or served alongside chips and homemade pineapple curry barbecue sauce. For a larger barbecue spread, add flatbreads, dips and a fresh tomato or cucumber salad.
🧊 Make Ahead, Storage and Reheating
Make ahead
You can prepare the seitan through the washing and resting stages earlier in the day, then keep it covered in the refrigerator until you are ready to season, shape and cook it.
The glaze can also be mixed in advance and refrigerated in a covered container.
Storage
Allow cooked seitan to cool, then transfer it to an airtight container and refrigerate it within two hours. Use it within two days or freeze it for later.
Reheating
Reheat the seitan in a lightly oiled frying pan over medium heat until steaming hot throughout. Brush it with a little extra glaze or add a splash of water to the pan if it has become dry.
Avoid overheating it, as prolonged cooking can make the texture increasingly firm.
Freezing
Freeze the cooked cutlets in an airtight container or freezer bag, separating them with baking parchment if necessary. Defrost them overnight in the refrigerator before reheating.
❓Frequently Asked Questions
I have not tested a direct vital-wheat-gluten conversion for this particular recipe, so I do not recommend replacing the flour with it one-for-one.
Vital wheat gluten behaves differently because most of the starch has already been removed. It would require different ingredient quantities and a different preparation method, so use a seitan recipe specifically developed for vital wheat gluten rather than trying to convert this one.
Use a fine strong white bread flour containing at least 12g of protein per 100g. You can find the protein amount in the nutritional information on the package, even if the percentage is not listed separately.
The high protein content is important because the gluten in the flour is what remains after the starch has been washed away. For this recipe, avoid self-rising flour, gluten-free flour blends, and flours containing seeds or whole grains.
No. Stop washing once the water remains pale and translucent rather than turning thick, white, and creamy.
You do not need to remove every last trace of starch. Washing the dough until the water is completely clear can leave the finished seitan firmer and chewier than intended.
This is normal, particularly during the first few washes. As the starch is removed, the dough can become loose, stringy, and difficult to hold together.
Keep gathering the pieces together and handle them gently rather than tearing them into smaller pieces. Once the washed gluten has drained and rested for 30 minutes, it should become much firmer and easier to work with.
No. A food processor fitted with a dough attachment makes it easier to distribute the seasoning evenly, but you can season the seitan by hand instead.
Sprinkle the smoked paprika and salt over the washed dough, then gently knead and fold it until the seasoning is evenly incorporated. Avoid adding lots of liquid seasoning at this stage, as it can make the dough slippery and harder to shape.
Yes. After the initial pan-sear, brush both sides of the cutlets with the smoky glaze and return them to the frying pan over medium heat.
Cook for another few minutes on each side, brushing on a little more glaze as needed, until the surface is sticky and caramelized and the seitan is hot throughout. Reduce the heat if the maple syrup begins to darken too quickly.
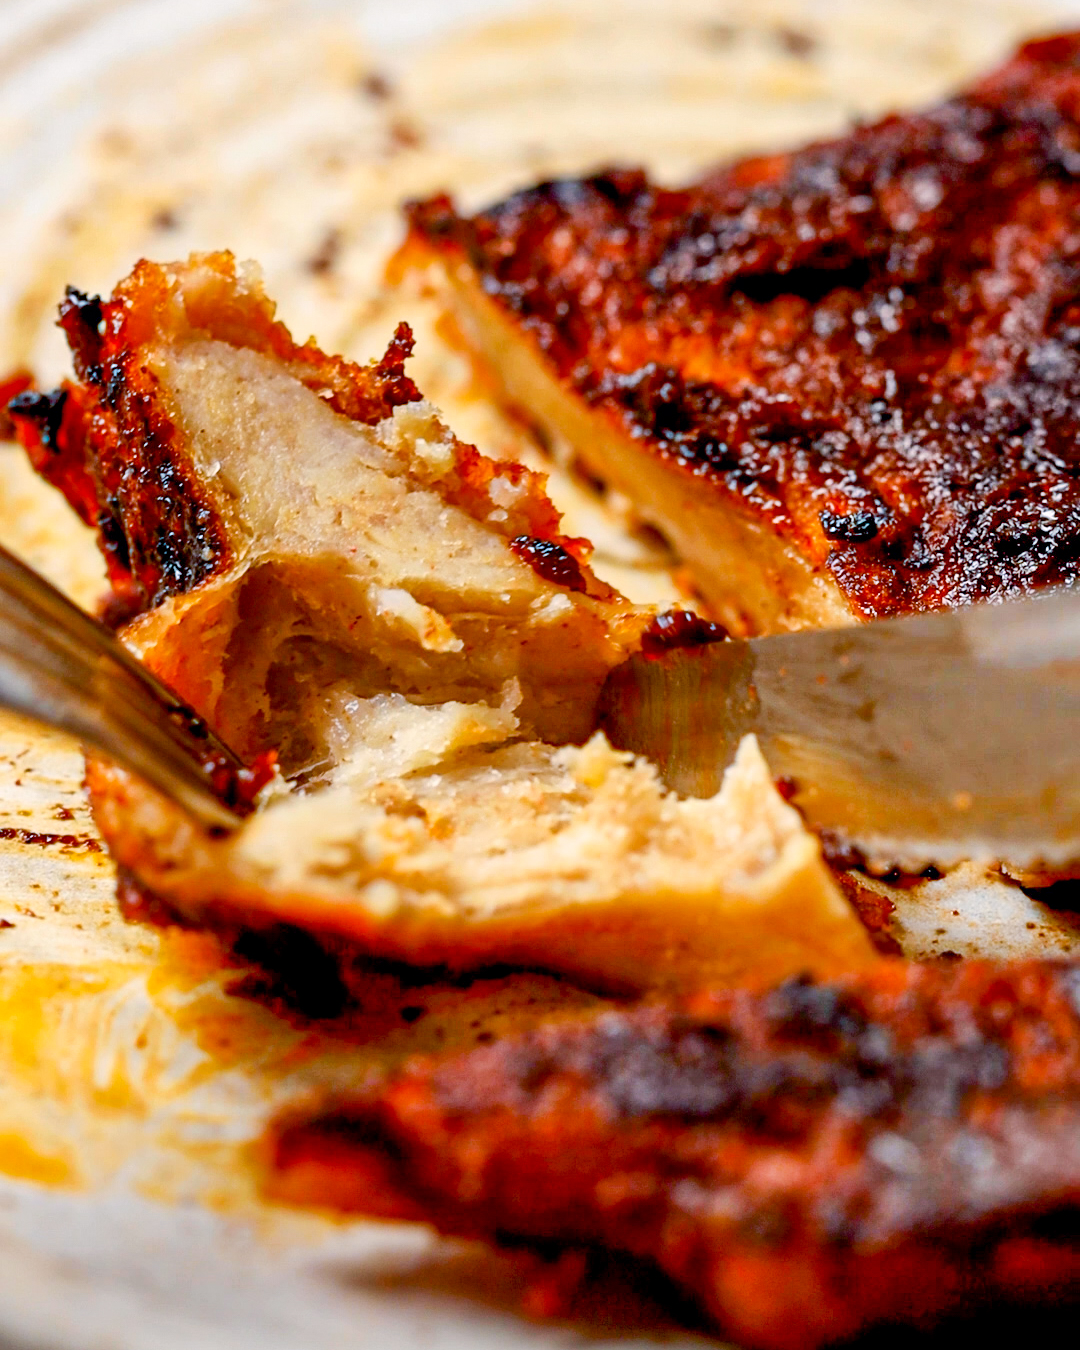
The outside should be browned and lightly crisp, while the center should feel firm, springy, and layered rather than wet, sticky, or doughy.
Check the thickest cutlet before serving. If the center still appears raw or gummy, continue cooking it over a slightly lower heat until it is firm and hot throughout. Do not taste the uncooked dough to check it - flour is a raw ingredient and should be cooked thoroughly.
Seitan naturally has a firm, chewy texture, but it should not be difficult to cut or unpleasantly rubbery.
When making it again, stop washing once the water is translucent rather than completely clear, avoid overworking the dough during the knotting stage, and shape the cutlets to an even thickness. Also take care not to cook them for much longer than needed, as continued cooking can make the texture increasingly firm.
The cutlets may be too thick, or the outside may have browned before the center had enough time to cook.
Return them to the pan or move them to a cooler part of the barbecue and continue cooking more gently. For your next batch, flatten the cutlets to a more even thickness before pan-searing them.
No. Seitan is made from wheat gluten, so this recipe is not suitable for anyone with coeliac disease or anyone who needs to avoid gluten.
Washing the flour removes much of the starch, but it deliberately leaves the gluten behind - that gluten is what creates the structure and chewy texture of the seitan. Gluten is a protein found in wheat, barley, and rye.
📌 If you love Pinterest you can pin any of the images to your boards!
More Vegan BBQ Recipes
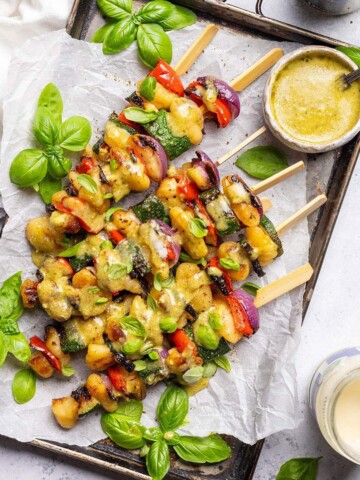
If you enjoy this Seitan recipe - or cooking with Seitan in general - you will definitely enjoy my Seitan Kebab recipe and Vegan Steak!
Did you make this recipe? If so, will you do me a huge favor and leave a review and star rating & let me know how you liked this recipe? THANK YOU! ❤️
Here's a handy recipe card that you can print out and keep in your kitchen for easy reference:
📖 Recipe Card
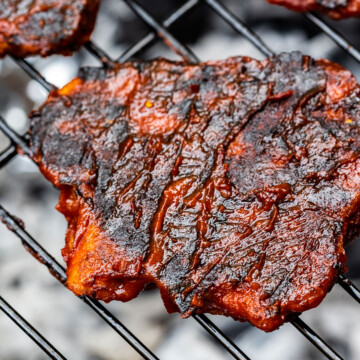
Vegan Grilled Chicken

Equipment
- large mixing bowl
- Colander
- Food processor fitted with a dough blade optional
- Large nonstick skillet
- small bowl
- pastry brush
- Barbecue or grill
- Tongs
Ingredients
For the seitan chicken
- 350 g strong white bread flour containing at least 12 g protein per 100 g
- 175 ml cool water plus more for soaking and washing
- ½ teaspoon smoked paprika powder
- ½ teaspoon garlic powder
- ¼ teaspoon fine salt
- 1-2 tablespoons neutral cooking oil for pan-searing, e.g. canola oil
For the smoky glaze
- 2 tablespoons tomato paste
- 1 tablespoon tamari
- 1 tablespoon maple syrup
- 1 tablespoon olive oil
- 2 teaspoons smoked paprika
- ¼ teaspoon fine salt
- ¼ teaspoon ground black pepper
Instructions
Make and soak the dough
- Place the flour in a large mixing bowl. Gradually add the 175 ml water, mixing until the flour comes together into a firm dough. If any dry flour remains, add extra water 1 teaspoon at a time.
- Knead the dough in the bowl or on a clean work surface for 2-3 minutes, until smooth. Return it to the bowl and leave it to rest for 10 minutes.
- Cover the dough completely with cool water and leave it to soak for 30 minutes.
Wash the flour
- With the dough submerged, gently squeeze, fold, and knead it under the water for 2-3 minutes. The water will become thick and milky as the starch is released.
- Carefully drain away the starchy water and refill the bowl with fresh water. Repeat the washing process approximately two more times, or until the water remains pale and translucent rather than becoming thick and creamy. It does not need to run completely clear.
- The dough may become loose, stringy, or appear to fall apart during washing. This is normal. Keep gathering the gluten together and handle it gently.
- Transfer the washed gluten to a colander and rinse it under cool running water for around 10 seconds. Leave it to drain and rest for 30 minutes. It should become firmer and easier to handle during this time.
Season and shape the seitan
- Add the smoked paprika, garlic powder, and salt. Pulse the seitan with the seasonings in a food processor fitted with a dough blade for 10-20 seconds, just until combined. Alternatively, knead the seasonings into the dough by hand.
- When using a food processor, return the seitan to the colander and let it rest for another 10-15 minutes so the gluten strands can reconnect.
- Gently stretch the seitan into a long, thick strip. Tie it into a loose knot, stretch the remaining ends, and knot them again. Repeat until you have made approximately 5-6 knots. This creates overlapping strands and gives the cooked seitan a more layered texture.
- Divide the knotted seitan into 2-3 pieces. Press each piece between your hands to form evenly thick cutlets.
Pan-sear the cutlets
- Heat 1-2 tablespoons of cooking oil in a large nonstick skillet over medium-high heat.
- Add the cutlets and gently press them against the hot pan. Cook for 2-3 minutes per side, or until lightly golden and crisp on the outside. Remove them from the skillet.
Glaze and grill
- Preheat the barbecue to approximately 150-170°C / 300-340°F.
- Combine the tomato paste, tamari, maple syrup, olive oil, smoked paprika, salt, and black pepper in a small bowl. Stir until smooth.
- Brush the glaze generously over both sides of each seitan cutlet.
- Place the cutlets directly onto the hot grill. Cook for 4-5 minutes per side, brushing on a little more glaze as needed, until caramelized, lightly charred, and hot throughout.
- Remove the cutlets from the barbecue and let them rest for a few minutes before serving.
Notes
- Flour: Use a fine strong white bread flour with at least 12 g protein per 100 g. Plain lower-protein flour may produce less gluten and a smaller or softer piece of seitan. Do not use self-rising flour or gluten-free flour.
- Water: The exact amount of water may vary slightly depending on the flour. The dough should feel firm and hydrated without being wet or sticky. Add extra water only 1 teaspoon at a time.
- Washing the flour: The water does not need to run completely clear. Stop once it remains thin and translucent rather than becoming thick and milky. Washing away every trace of starch can give the seitan a firmer texture.
- Cooking without a barbecue: After the initial pan-sear, brush both sides of the cutlets with the glaze. Return them to the skillet over medium heat and cook for another 3-4 minutes per side, applying more glaze as needed, until sticky, caramelized, and hot throughout.
- Storage: Allow leftovers to cool and refrigerate them in an airtight container within two hours. Use them within two days or freeze them. Reheat only once and make sure they are steaming hot throughout before serving.
- Food safety: Do not taste the uncooked seitan dough. Flour is a raw ingredient and should be cooked thoroughly before eating.
© 2026 Romy London / Romina Callwitz | All images, videos, wordings and content are copyright protected and belong to Romina Callwitz. Please do not use any of my content without prior permission. If you wish to re-publish any (part of my) content, please get in touch via email. Thanks for your support!
*Disclosure: This page may contain affiliate links and sponsored links that earn me a small commission, at no additional cost to you. You can find more information in my Privacy Policy.
Mano says
These are absolutely next level!!! Never made something so good on the grill before, not even kidding. Thanks for this awesome recipe 👏🏾